Return to atmosphere
Video of the installation process on Win7 | Error "Source file not found"
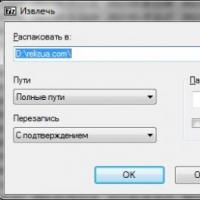
1. Remove the previous version from the system (if it was before)
2. In any temporarily created folder on the C: drive [the name of the temporary folder you created]
Expand from an ISO image, using for example the WinRar 5.40 archiver, program files:
For 32 bit Windows - from ableton_live_suite_9.7.2_32.iso image file
For 64-bit Windows - from ableton_live_suite_9.7.2_64.iso image file
3. In the deployed image, you must add a file, it is not in the image (they forgot to put it!)
[the name of the temporary folder you created] \ Ableton \ Live9 \ Suite \ Resourses \ Core Library \ Ableton Folder Info \
Previews \ Devises \ Instruments \ Collision \ Synth \ Percussion \ Dark Deep Drum Unpitched Percussion.adv.ogg.asd
To restore it, we take any file with the .asd extension from this folder, and beforehand somewhere
copy it and rename it to the one we need: Dark Deep Drum Unpitced Percussion.adv.ogg.asd, after that
we drop the renamed file into the above specified long path. The installer, for his absence, will no longer swear.
4. Start the installation, from this folder - with the deployed files, by clicking on the Setup file, the installation will start
During the installation process, we agree and confirm by default, until a request appears, how
name the program folder (by default, it substitutes Ableton Live 9 Suite), but if there were unsuccessful
attempts to install, then the installer after clicking the "Next" button stupid and does not go further. It can be solved simply
changing the name of the folder (I just left it: Ableton, erasing everything in the name) and after clicking "Next"
the installation of the program goes smoothly.
5. After installation, launch the program, a registration window appears, press the top button and see the hardware code
we write it down.
6. From the image, copy the Ableton KeyGen code generator, for example, to the Windows desktop, start it with a double click and
in the top line, enter the hardware code, start the generation of the authorization file, it will be created with the name Authorize.auz
right there on your desktop.
7. Copy it to the folder where the program was installed (in my case, in C: \ ProgramData \ Ableton \) and double-click it there
the program window will open with a message about successful authorization. After that, you can work with the program.
8. Immediately disable the update in the program by opening Options> Preferences> [tab] Licenses Maitenances in the running program
and in the middle of the window with this tab opposite Get Automatic Updates, set off in the selection field
[collapse]
Short description
Year / Date of Issue: 07.2017 Version: 9.7.3
Developer: Ableton
Developer site: www.ableton.com
Bit depth: 32bit, 64bit
Interface language: Multilingual
Tabletka: present
System requirements: Windows XP or higher
Plugins for Ableton
Ableton Live 9 supports VST plugins. There are a lot of VST plugins and it is not possible to list them all, but ...
If you are interested in VST guitar plugins or VST drum plugins, then on the page with there is not a bad selection of such plugins. In the "Soft" section you can also find useful VST plugins.
[collapse]
Ableton live 9 suite how to install VST plugins
- Create a VST folder - for example C: \ Program Files \ VST
- Install the downloaded VST plugin to this folder "C: \ Program Files \ VST"
- Launching Ableton
- Go to options -> Preferences -> File Folder -> Plug-in Sources -> VST Plug-in Custom Folder -> Specify our path "C: \ Program Files \ VST" -> click "Rescan" -> restart Ableton -> The plugin should appear in the list of installed plugins (item "Plugins") -> To use the plugin, drag it to the desired midi track
[collapse]
Ableton live 9 does not see vst plugins and tools
Q: Live can't see VST. The path is spelled out correctly. Rescan doesn't help. What's the matter?
Q: How can I make 32-bit VSTs work on x64 system?
A: 64-bit Live does not see 32-bit VSTs and vice versa. Those. for Live x32, only VST x32 will work, and for Live x64, only VST x64 will work. You can use jBridge or 32 Lives crutches to work around this limitation.
[collapse]
Ableton 9 does not see sylenth1
- Transfer from Program Files x86 to Program Files (or vice versa), do rescan or restart Ablik.
- Check if there is a Sylenth1 folder in / Program Files x86 / VstPlugins and in / Program Files / VstPlugins.
- Try to do a full rescan: go to the settings, the tab where the rescan button is, hold down the "alt" button and press rescan, this method has helped me more than once.
- Most likely you are trying to run the 64-bit version in 32-bit eblton, or vice versa.
[collapse]
Ableton live 9 does not see waves
The problem was solved as follows, I just put the plugins in the program files \ vst folder and the ablik saw them there, before that I put them in C: \ vst
[collapse]
Ableton live 9 does not see wavesshell9
Option 1:
1. Run the installer
2. Select Waves Tunes and RS56
3. After installation, in the settings open> Applications> Waves> Plug-ins and delete the RS56.bundle file
Option 2:
- Remove "WaveShell-VST 9.2_x64.dll" from the 64-bit VST plugins directory.
- Launch Ableton Live 64bit
- Close Ableton Live 64bit
- Copy "WaveShell-VST 9.2_x64.dll" from the directory "C: \ Program Files (x86) \ Waves \ Waveshells" to the folder for 64-bit plugins
- Launch Ableton Live 64bit
[collapse]
Ableton live 9 does not see nexus
Bit depth of Ableton and Nexus must match
Perhaps the plug-in needs to be installed in a special folder, or the path to it must be specified in the program. It is also possible, although unlikely, that the program does not see either 32-bit or 64-bit plugins. You need to see what plugins the program supports, and when installing the plugin, choose the appropriate option.
[collapse]
ableton live 9 no sound in headphones
Ableton live 9 does not save project
Most likely there is a problem with the activation of the program. Activate the key for the ableton or install the "alternative" version of the program.
[collapse]
Ableton live 9 does not open track writes about an error
Try to load the project without VST, if the problem is in some plugin, the project will open
[collapse]
"this authorization file is invalid on this computer"
Option 1:
Question: I installed Ableton on a Mac, logging into it through the "Authorize.auz" shortcut, the first time after installation it goes fine, and the second time he writes to me "This authorization file is invalid on this computer", and every time I have to reinstall it again)
Option 2:
Try to remove and install on a new one, in the pirate read how to install, perhaps after installation, the file needs to be replaced
Option 3:
1. Uninstall old abliks (if any)
2. Install this new one (Run Setup.msi)
3. Run the program itself
4. In the authorization window that appears, select - No internet on this computer (or something like that)
5. Further, in the same updated window, select SAVE and save it to the Hardware Number text file (you will see it there)
6. We do not close the program !!!
7. Launch Keygen
8. Copy there your Hardware Number from the created text file and click Generate
9. Keygen generates authorize.auz file. We save it.
10. Next, take this authorize.auz, select it with the mouse and drag it directly into the open program
11. Done
[collapse]
In the modern world, you can create hits and work with music without leaving your computer. This makes the creative process smoother, easier and more convenient. Untitled Ableton Live 9 Suite can be distinguished among the software with which you can create music. You can download Untitled Ableton Live 9 Suite in Russian on our site is completely free. What does this software technology conceal in itself?
Program description
Untitled Ableton Live 9 Suite Designed For Musicians... Electronic music playing Robert Henke and Gerhard Beles wanted to create their own music using computer technology. Already in 2000, they released the first version, thanks to which it was possible to perform live. This program has gained popularity due to its ability to combine musical elements, single samples or multiple sounds.
Ableton Live 9 Suite can change the tempo and tone of audio... To do this, you need to learn how to work with warping. With it, you can quickly combine different music tracks, changing the tempo and tonality, adjusting one track to another. Thanks to this program, it is possible to arrange a song, quickly make changes and mix into a single mix.
Possibilities
Program Untitled Ableton Live 9 Suite, which can be downloaded in Russian can be completely called original and unique, this program combines many functions and capabilities.
Ableton can be considered an innovator as it has enabled tone stretching and shifting in real time.
- The program has the ability to analyze audio and create a MIDI track based on it. Now you can sing the song and get the keyboard part for it.
- It is possible to create many different samples from one audio track using the Slice to New MIDI Track function. It also makes it possible to reproduce them in the prescribed manner.
- The program allows you to use a MIDI controller. Therefore, you can safely forget about a computer mouse and use knobs, faders and control everything with one keyboard.
- The presence of the Max For Live extension, which contains many effects, interface tools for DJs, a step sequencer.
Guitar Pro 5 free download Russian version
Peculiarities
This program is a professional tool for music creation and track processing. It has a very user-friendly and intuitive interface with a lot of samples and loops.
A wide range of sound effects allow you to achieve a unique sound. Tracks can be edited on the go using a variety of musical instruments. Untitled Ableton Live 9 Suite is an indispensable tool for studio work... You can install the program on Windows 7, 8, 10, Mac OS.
The user of this program will be able to create one of several tracks and become a real DJ, making remixes with original effects.
A clear interface will help you to independently figure out and understand how the program works.
Session mode
In this section you will find a grid of clip slots. In it, you can experiment with sound, individual notes, parts just before the arrangement. One clip can be created with each cell. This term refers to a piece of audio. They can be played together or stopped some at certain times.
Do not forget about using a mixer, that is, a section in which you can adjust the volume and panning. You can use the "mute" key, which will mute a specific track. If you put the Solo sign on a certain track, then it will be able to drown out all the others.
The program also contains a crossfader, thanks to which you can mix two tracks together with one click, which is very useful for DJs.
Arrange mode
This mode is necessary for the final mixing of tracks. A huge plus is that you can deal with processing several tracks at once, as needed for grouping.
You can find the arrangement mixer on the right side of the screen. You can open it fully to see the details and see which clip is being placed on which track.
With the help of editing in the arrangement mode, you can change the structure of the track, correct mistakes. Such a function as cutting clips and their consolidation is possible.
Download Untitled Ableton Live 9 Suite in Russian - this is the best software for creating musical masterpieces... It is not only a digital sound station, but also a way to bring musical ideas to life. The intuitive interface will help even beginners quickly master the correct work with musical compositions.
Preferences - Audio
This menu tab allows you to select the type of driver and sound card that Live will use for audio playback.
Here you can also find parameters that determine the performance and sound quality. The choice depends a lot on what kind of sound card you have, how it was installed, and what operating system you are running.
When you click the "Audio" tab in the "Preferences" menu, a window appears, consisting of four sections (the sections are separated from each other by bars):
- "Audio Device"
- "Test"
Let's take a look at each of them in order.
Audio Device Section
This section is designed to configure the driver and select your sound card or audio interface.

Driver Type - The first setting you can choose here is the type of driver for your sound card.
On a PC, the menu includes two types of drivers: "MME", "DirectX" and "ASIO". On Mac, only “Core Audio” driver type can be selected.
For the copy installed on Windows, I chose the "ASIO4ALL" universal driver, suitable for almost all types of sound cards. Or I chose the Asio driver for my E-Mu sound card. When working with this driver, the latency is much lower than that of the "MME / DirectX" drivers.
In short: thanks to ASIO, audio signals from external sources and commands from Midi-controllers reach Ableton along a shortened route, without entering the "gloomy jungle" of the Windows operating system.
Latency ("latency") of MME / DirectX drivers is more significant in comparison with ASIO, because the signal is forced to overcome all the tangled corridors and cabinets of the Windows operating system.
Audio Device Input / Output - in the drop-down menu you can select the type of audio device used for the inputs and outputs. In my case, I use my M-audio E-Mu 0404-USB audio card. its two inputs are used to connect microphones and guitars. Its two outputs (Outputs) are displayed on monitors.
Chanel Configuration Popups
Chanel Configuration - under the drivers menu there is a Channel Configuration item with two buttons: "Input Config" and "Output Config"... By clicking on each button, you will see a different pop-up window where you can activate the various inputs and outputs that you can use in Ableton. The ones you activate here will be available to work with Ableton Live in the future.

It is better to turn off unnecessary inputs or outputs that are not involved in the work. This will save you some power on your computer.

This tab will become necessary for you if you are overgrown with equipment and are going to set up your system for live performances. If you have a suitable sound card with the required number of inputs and outputs (4 or more), then you can enable / disable them in this menu.
Most often, you may need additional inputs if, for example, you want to route the preview signal to a separate output (3/4 stereo output) to the headphones so that you can listen to tracks in the browser while your set is being output to the hall. Or you have an external effects block to which you want to route certain tracks of your set, etc.
Hardware Setup (on Windows) - using this button, the driver settings window of the sound card is called directly, where the buffer size and latency time are set. When you feel that the program is recording sound with a delay, the first thing you need to do is dig into the settings here, guided by the sound card's manual.
The sample rate of the project is selected here. To put it simply, it determines how high-quality the sound recorded and reproduced in Live will be, and how carefully it will be calculated. A good option is 44,100 Hz, or 44.1 kHz, which is the frequency that audio CDs have.

As always, there is a lot of controversy on the internet about which frequency to use. There is no point in analyzing this here. I just recommend that you never go below 44,100 Hz. If you raise the bar higher, then you begin to load the processor. So calculate the capabilities of your equipment.
Default SR & Pitch Conversion - high quality sample interpolation mode, it is better to leave it active. If your music requires a dirtier sound, then you can always turn on lower quality interpolation in any audio clip you want.
This section contains settings that determine the buffer size and delay time of the sound card. The smaller the buffer size, the lower the input / output latency, but the more performance is required from the computer.

In order to achieve the best result, you need to experiment with these settings (remember that driver selection also affects latency - see Driver Type as well as settings in Hardware Setup).
Test
The last section in the Audio tab is the section called "Test".

This section is made to test the settings you set in the “Audio” tab.
Test Tone - turns on the test signal. So you can check if there is a sound signal without leaving the menu. You will also be able to judge by it - whether there are distortions, crackles, interference. If there is, the computer is not coping with the settings. And, of course, you can start calibrating your own monitors.
Tone Volume- adjusts the volume of the test signal.
Tone Frquency- allows you to fine-tune the frequency of the test signal. By default, this is the "A" note.
CPU Usage Simulator- emulation of processor overload, maximum - 80%. If you brought the load to the highest values, and did not hear interference in the signal, then you have configured everything correctly.
Live 9 makes it easier than ever to build enticing drum tracks and music sequences from scratch. But you never got the feeling that you were working, maybe there is something missing sandy texture, special build, a kind of unique atmosphere?
At this point, you can start hunting through the sample libraries, looking for the unspeakable, but it often turns out to be useless to rely on samples from other sources to sit well in the context of what you already got off the ground, ideally you need something in the key and the scale of your composition that fits seamlessly with the atmosphere you've set. This may sound like a daunting task, but the answer may already exist in your set.
Construction Back Network
Pic 1: I quickly created a basic electro breakbeat loop in Session View.
Original Loop:
[Audio ID = "23407"]
I have a repetitive synthesizer loop using an Analog instance that seems a little bare, so this is what I'll try and treat first. I will create a new channel Return using hotkeys Command-Option-T, and now we have a new track, Return Ready Effects (Fig. 2), on which I will put Overdrive, Simple Delay, Frequency Converter and Phaser (Fig. 3), in that order.


What is important here is that on a dry / wet dial, a simple delay is set all the way to wet, if there is any percentage of dry bleeding signal through, we may get some unwanted stages and issues such as the original notes show through on both channels. I set a simple delay of 1/4 note sync, no feedback, so they play between the 1/2-bar synthesizer cycle of the note; I then adjusted the Shifter Frequency to ring modulator mode, and tweaked the Phaser to taste resulting in a uniquely skewed response on the original synthesizer line.
Synth line plus return:
[Audio ID = "23406"]
Capture track setup
In order to reflect the results of our Return Effects for further audio editing, we need to create a new audio track in our set. Using hotkeys Command-T, I added a new track and renamed its capture (Fig. 4).

My next step would be to hold down the key Shift, to make multiple selections from all of my return channels, and, with all of them selected, change their audio routing in the In / Out routing matrix to our new track, labeled Capture (Figure 5). Of course, these channels can be redirected individually, but why waste time?

Finally, I'll set up our track's capture source monitoring and arm it for recording (Figure 6). We can now start capturing the results of our Return to Audio effects, as well as bus the process of our Returning Effect through any sound effects we place on our Capture track.

Capture Wild Audio
Now that only the game Synth track and the corresponding Send amount for our target Return track (in this case, F) are set to maximum, we can initiate recording to a new clip slot on our capture track (Fig. 7). However, once we have recorded the desired audio, we now have to create a new audio track for it, and drag the newly recorded clip from the Capture track onto a new, highlighted audio track (Fig. 8), which I answer here by name.


Editing a new clip where I can hear it, I quantized the audio and switched to Tonal Warp mode (Fig. 9). Next, I'll duplicate this edited clip to a new slot, transpose down an octave (-12 semitones) and switch it to Beats mode with some Transient Playback modifications to achieve a shorter single note decay (Figure 10).


Synth plus low octave Answer:
[Audio ID = "23405"]
I'll duplicate this clip, and put it back, put it back in Warp Tones mode, transpose it by an octave (12 semitones) and make some time adjustments (Fig. 11). At the end of the day, I think this is the one I will be using.

Synth plus Higher Octave Response Reverse:
[Audio ID = "23408"]
Building from Echoes
At this point, I think it would be useful to have an element that will build in or introduce new parts of the song. I'll start by running my Funk Stab way through the dashed 1/8-note dub delay on my return channel D (Fig. 12). Just as I did with the previously captured element, I will make sure that no other clips are triggered to play the recording until I have it so that no other effects Return tails are captured.

With the clip and the transport triggered stopped, I can start recording by clicking on the empty clip slot circle on our capture track. What's important in this case is that I stop playing the Stab Funk clip after just one bar, so that we can let the trail delay off naturally otherwise we end up with a rhythm pattern that continues and the loop continues to cause the delay. I will stop recording the tail delay after 9 bars so that we have at least 8 bars of delayed feedback to work with (Fig. 13).

Echo Funk Stab:
[Audio ID = "23409"]
Now I will create a new audio track called Echo Build and Pull our newly captured delayed feedback audio clip to it. Next, I reverse the audio, transpose an octave higher, lower the volume, and switch to Tone Curve mode for smoother reproduction at higher print densities. Finally, I turn off the loop, set the end marker to 8 bars (Fig. 14), and add a little room reverb to taste. Send via A. Now we have a customized tonal build based on the activities and taking into account the elements and setting up our track.

Echo Build in Action:
[Audio ID = "23410"]
PRO-TIP: To add a reverse build effect to this, try running the beat (or equivalent) through and through the delay and long tail of the reverb before recording, reverting, and processing it.
Return to atmosphere
At this point, we've evoked some unique melodic and transitional elements from our return effects, but I feel like the track still lacks atmosphere, so I'll capture some of the reverb of our deep sounding chords to use as a background panel.
First thing, I will turn Send on this track to the maximum (Pic 15). Only with our deep clip the Accord triggered and our armed Capture track, I then record in two bars a segment of the ambient reverb (Fig. 16). Finally, after transferring it to the newly created and appropriately named audio track (which I named Reverse Chords here), I will transpose the clip 12 semitones upwards so as to distinguish it from the original signal, switch the Tone Warp mode with the grain size set to 100. and also adjust the loop of the staple to the 1/2-bar segment (Fig. 17).


Beats now with added ambiance:
[Audio ID = "23414"]
PRO-TIP: For a more dynamic atmosphere, try adding modulation effects such as chorus, or Flanger Phaser.
Interstitial noise
Finally, the beats seem, perhaps, a little stale so now I will capture something more rhythmic to try and spice them up.
Dry drums:
[Audio ID = "23411"]
I crank up the reverb on my drum track Send via B and record the result in our Capture track as in our previous procedures, resulting in a 4-bar clip (Fig. 18). I'll create a new audio track for it called Drum Noise, drag the new clip over, transpose, adjust the volume and warp, and reverse the sample (Fig. 19).


Now I will add an Auto filter set to Hi-Pass to eliminate some of the lower frequencies, and place the compressor on the way to the side chain of it from the input of our accents network, will find at 2 and 4 (Fig. 20).

Drums with side chain flattened noise number (9 - drums with Noise.wav):
[Audio ID = "23412"]
Create Texture Inspiration
Sound design can be a rewarding creative pursuit in and of itself, but you don't have to do all your external design in a production context. By integrating these techniques with your workflow, you should be able to find and create all kinds of new sounds based on work you've already done. While we were looking at the number of applications for this technique, we only scratched the surface; by getting creative with initial return effects, adding effects and automating your captured audio, and even editing it into completely new loops and patterns, there are all kinds of ideas lurking just beyond the surface of an existing session. Feel free to experiment.
Full loop integration of all capture based sounds.
We extract the program
If you are an honest licensed user of Ableton Live 9, then most likely you have purchased (or are about to purchase) this program in the form of a digital copy on the official website ableton.com.
In Russia, this is the most common way to purchase a licensed version of Live.
It should be noted that you can download the Trial-version of Ableton from the official website for free, which will work properly for 30 days. It's a great option for anyone looking to understand what Ableton Live is, and if it's worth it at all.
On the official website, we are offered to download a free Trial version, which can function properly for 30 days.
Purchase of the program
So let's say you decide to buy a program. In this case, you will need to register on the official website Ableton.com, i.e. create your profile, and then "put in the basket" the product you need (in my case it is Live 9 Suite). This will be followed by payment of an impressive amount using a bank card.
If the result of this operation is positive, then the purchased product will appear in the list of available products in your personal account:

In your personal account, you can always look at the list of purchased products and various add-ons supplied with the program.
Now from your personal account, by clicking the "Download" button, you can download the licensed version and any additions to it.
Please note that below under the list of purchased products there is an item "Last Successful Autorization"(last successful authorization).
During installation, Ableton Live always accesses the official site via the Internet, as if "synchronizing" information about your copy of the program with the official site. This is called authorization.
If not, the program "resets" its functionality to the Demo version, in which the ability to save projects is disabled.
Installing Live on Mac OS X
Installing Live 9 on a Mac OS X computer is very simple. Once downloaded, open the disk image file (.dmg) and drag Live 9 to the Applications folder on your hard drive. For quicker access to Live, you will most likely want to add a program icon to the OS X dock. This is a shortcut bar with program icons. To do this, simply open the Applications folder and drag the Live icon to the Dock. The system will instantly create a shortcut in it. To remove an item from the dock, drag it to the trash can or to the desktop, and you will see how it "puuuuf" disappears.
MAC users, please note: OS X has built-in storage for all your third-party instrument and effect plugins. It is located along the path: Library> Audio> Plug-ins. I think it will be convenient to drag this folder to the "Places" area in your Finder "and for quick access. Some plugins have installation programs that place files in the above designated folder automatically, while other plugins need to be copied to this location yourself. Inside the folder "Plug-ins" you will find different folders for each type of plugins that OS X supports. Live can use VST (which we send to the "VST" or "VST3" folders) or Audio Units (which need to be sent to the "Components" folder) ...
Installing Live on Windows
Installing Live on Windows is much like installing any other Windows-based program. After you open Setup and follow the instructions, the Live installer will ask you where you would like to place the Ableton folder and all the files. I recommend using the default settings, which installs your Live in the Program Files directory.
Also pay attention to the item that defines where your VST plugins folder will be located. It is a common practice to keep VST plugins in one main folder so that every VST compatible program can use them. For example, if you have Steinberg Cubase SX on your computer, then you can tell Live to search for plugins in the VST plugins folder using the following path: Program Files> Steinberg> Vstplugins, i.e. along the same path that Cubase itself searches for VST plugins.
When you launch Live for the first time, you will be given the option to register Live or launch it in demo mode. Login will open your main web browser and take you to ableton.com where you will need to login or create a new user account. If you downloaded your Live from ableton.com, the Live 9 serial will already be entered into your account and the authorization process will begin immediately.
Ableton allows you to install Live on two computers. If you change one of the computers, there is a chance that the authorization on your new computer will fail because you have used all your "keys". Don't worry - just send an e-mail to those. customer support and explain the situation.
First launch of the program
During the first launch, the program for several minutes (or longer) installs all the library files necessary for operation, and also scans the plugins available on the computer.
Be patient, don't worry! It should be noted that on computers released five years ago, Ableton Live is installed especially slowly.
Most often it happens that after installation, Ableton is completely ready to work, plays sounds, and functions without problems. In that case, hurray! You can get to work!
An introduction to the Preferences menu
It is possible that the program does not want to function as it should. There is no sound, or some clicks and distortion are heard. All of these problems point us to the need to take a look at the Preferences menu - the heart of Ableton Live. It contains all the most important settings, which often not only fix problems that arise, but also make your work with the program more convenient and productive.
Preferences can be opened by clicking in the upper left corner of the menu Options - Preferences(on Mac Os - a little differently: Live - Preferences).

Open the "Preferences" menu.
I know from myself that when you first start the program there is no desire to get bogged down in a cumbersome and so far incomprehensible menu, but I want to get to work as soon as possible and try all the opportunities that have opened up.
But there is one nuance that needs to be discussed right now, so that your first acquaintance with the program is not overshadowed by annoying audio delays called "latency".
If you are working on Windows, then you will definitely come across them.
The lag is most noticeable, for example, when you play the keys on your midi keyboard (or computer keyboard). It takes a few moments before the software instrument plays your notes. This is the delay that needs to be dealt with at the very beginning of working with the program.
In the case of Mac OS, which has a non-PC architecture, you do not need to install the ASIO driver. Your Mac will already be able to play audio without any delay.
So, the next paragraph in this section is devoted to just the most necessary driver settings on a PC. Then we will proceed to a detailed analysis of all the other tabs and nuances of the Preferences menu.
 Download the new version of the archiver 7 zip
 Configuring Mozilla Thunderbird: How To
 OL PORTAL - all social networks and messengers in one application
 Programs for communication in games
 XnView free download for Windows (Russian version) Xnview help in Russian
 Crashes when installing or running DirectX in certain applications
 Navigators offline (no internet) for Android: rating review