Password for entering windows 10. Getting rid of the request for credentials for the user
To log into Windows 10, the user has to enter the password for their local or online Microsoft account each time. This provides a certain level of protection of computer data from third-party access, but is inconvenient for home users, because increases the access time to the desktop. In this tutorial, we will look at how to remove the user password prompt on the Windows 10 login screen (Windows Server 2016/2012 R2) and configure automatic login under a specific account.
Warning... Automatic logon is used for the convenience of the user, but reduces the level of protection of data on the computer. Autologon should be enabled only if you are the only user of the computer and are sure that no one else can access it. Otherwise, the security of your personal data is at risk.
Disabling password entry does not mean that your account should not have a password. It's just that when you boot Windows 10, the password for logging into the computer will be substituted by the system itself. In all other cases, for example, when accessing from another computer over the network or when connecting to a remote desktop (rdp), the password will have to be specified manually.
Disable password entry in account settings
The easiest way is to disable the password prompt in the system user account settings.

Note... On computers that are members of an Active Directory domain, you cannot disable the "Require username and password" option because of. In this case, the easiest way is to disable the password prompt using the registry (described below).
Remove Windows 10 login password through the registry
Let's consider a more universal way to disable the password prompt - using the registry editor. This method allows you to disable password prompt for Microsoft account, Windows 10 domain or local account.
Warning... This method is also less secure, since your password will be stored in the registry in clear text and can be viewed by any computer user.

To enable autologon through the registry, you can use the following commands (replace root and [email protected] with your username and password, WORKGROUP needs to be replaced with your AD domain name if the account is domain):
reg add "HKLM \ SOFTWARE \ Microsoft \ Windows NT \ CurrentVersion \ Winlogon" / v AutoAdminLogon / t REG_SZ / d 1 / f
reg add "HKLM \ SOFTWARE \ Microsoft \ Windows NT \ CurrentVersion \ Winlogon" / v DefaultUserName / t REG_SZ / d root / f
reg add "HKLM \ SOFTWARE \ Microsoft \ Windows NT \ CurrentVersion \ Winlogon" / v DefaultPassword / t REG_SZ / d [email protected]/ f
reg add "HKLM \ SOFTWARE \ Microsoft \ Windows NT \ CurrentVersion \ Winlogon" / v ForceAutoLogon / t REG_SZ / d 1 / f
reg add "HKLM \ SOFTWARE \ Microsoft \ Windows NT \ CurrentVersion \ Winlogon" / v DefaultDomainName / t REG_SZ / d WORKGROUP / f
reg add "HKLM \ SOFTWARE \ Microsoft \ Windows NT \ CurrentVersion \ Winlogon" / v IgnoreShiftOvveride / t REG_SZ / d 1 / f
reg add "HKLM \ SOFTWARE \ Microsoft \ Windows NT \ CurrentVersion \ Winlogon" / v AutoLogonCount / t REG_DWORD / d 1 / f
Disable password prompt when exiting from sleep mode
It may also be worth turning off the password prompt when the computer wakes up from sleep mode. The easiest way to do this is to use the interface of the modern Control Panel.

Safe way to enable autologon on Windows using Autologon
To more securely enable automatic login to Windows 10, you can use the system utility Autologon for Windows... In addition, all the previous ways to enable autologon in Windows may not work if the computer is included in an AD domain. The utility was part of the Sysinternals system utilities and is now available for download on the Microsoft website (https://technet.microsoft.com/en-us/sysinternals/autologon.aspx).

To disable automatic login to Windows 10, just click on the Disable button.
So, we looked at how to disable password entry when logging into Windows 10 and boot the computer directly to the desktop. To temporarily disable auto-login in Windows and manually select a user and specify the password under which you want to log in, you need to hold down the Shift key when Windows starts up.
When you turn on the computer, as a rule, asks for an access code. Protecting your account with a password is designed to close access to your confidential information for other users. However, if you are single user personal computer, the constant request for a password when logging into the system will rather interfere than help.
This is an unnecessary action, unnecessary information that needs to be remembered, an increase in boot time when the PC is turned on, and so on. Besides, if you forget it, you will get a lot of problems.
Therefore, most users find it easier to remove password entry for your account in Windows 10. This article is devoted to this issue.
Disable password for local account
If you use a local account to log into Windows 10, cancel password entry simple enough. You can simply delete it.
To do this, do the following:
- Call the menu " Start»Using the Win key, or using the corresponding icon on the Quick Access Toolbar.
- Open " Parameters". You can also call this interface using the Win + I key combination.
- Go to the section called "".
- Using the navigation menu on the left side of the window, go to the category " Login options».
- In the column " Password»Click the Change button.

- Enter the current access code for your account.

- Leave all fields blank and click Next to uncheck.

- If the OS asks to reboot, do it.
Acting the password will be removed immediately and is not required to log on to the Windows 10 operating system the next time you turn on your personal computer.
Alternative way to disable the request
If you don't like the settings menu that was introduced in Windows 10, you can remove the passcode using the familiar control panels... For this, the tool " Change».
Do the following:
- Click on the button " Search»On the Quick Access Toolbar.
- Enter« control Panel" fully or partially.
- Run found utility.

- Go to the "" category.

- Click on the hyperlink “ Removing user accounts».

- Select your account from the presented list.
- Click on the hyperlink " Change Password».

- Enter a valid password, the rest of the fields should be leave empty.
- Click " Change password»To save the settings.

As in the previous method, the password will be removed and you will not need to enter it the next time you log on to Windows 10.
Disable the prompt for a Microsoft account
The above methods allow you to get rid of the password check on login, but only when you are working with local accounting... However, Windows 10 allows you to log in to the system using single Microsoft account... And it is no longer possible to remove the password in it. However, you can set up automatic input of the login information when this personal computer starts up. This can be done in two different ways.
Account settings
The first way to remove the check is the simpler one. However, unfortunately, does not work on all computers... It is highly recommended to try it first. And in case of failure, proceed to the next item. To set up automatic input without prompting, follow the instructions below:

In most cases, this is enough to log into the OS without asking for a password. However, if you are unable to remove the check, you will need to do by manually editing the registry.
Registry changes
The registry stores data that Windows 10 uses to operate. By modifying existing entries and creating new entries, users can seriously change the way the operating system works. Therefore, all changes should be made extremely careful, since any error can lead to incorrect operation of the computer.
Before starting work in the registry editor, it is strongly recommended to make a system restore point. If something goes wrong, you can easily roll back to your saved version of Windows 10 without having to reinstall.

Registry Editor
To enter the editor, users will need to do the following:
- Call the dialogue " Execute"Using Win + R.
- Enter regedit and click OK.

- If the program requires administrator permission, click OK.
- On the left side of the editor is the directory tree. Use it to find the HKEY_LOCAL_MACHINE \ Software \ Microsoft \ Windows NT \ CurrentVersion \ Winlogon directory
It often happens that you do not need to enter a password every time you start Windows 10. For example, you have a home computer or laptop, and you are sure that no one except you and your close relatives (who already know the password) will be able to use the device. And you want your Windows 10 to start right up to the desktop when you start your computer, without the hassle of having to enter a password.
If you are sure that you do not need a password when entering, then I will tell you step by step with pictures, How to disable password entry when logging into Windows 10.
In Windows 10, this is done in the same way as in previous versions of this operating system from Microsoft: "seven" and "eight".
To begin with, while holding down the Win key (this is the Windows system key on the keyboard, located, as a rule, between the left Ctrl and Alt), you need to press the Latin letter R.

In the "Run" window that opens, enter the command netplwiz and click OK.

In the "User accounts" window that opens, we need to uncheck the box "Require username and password", and then save the changes by clicking OK.

In the last step, you will be prompted to enter your password twice to confirm that you really want to disable password entry when logging into Windows 10.

That's all. When you log on to Windows 10, you will no longer be prompted to enter your password. Your computer will start itself up to the state of the desktop, while you, for example, go about your business in the morning.
Note! Disabling password entry at boot Windows 10 may not be disabled immediately, but only from the second reboot... That is, the next time you turn off and turn on the computer, you will have to enter the password. Perhaps this is a glitch of the operating system, or maybe its additional protection.
Needless to say that enable password entry when logging into Windows 10 can be done in the same way.
P.S .: After the article was written, the following entry appeared in the comments below: “ After all the suggested actions, I rebooted twice; initially does not require a password, but if the beech cover is closed and opened again, it asks for a password again."The question of the Windows 10 user arose quite natural and fair. Therefore, I am adding here a way to cope with this task as well.

Until then, we are with you disabled the password prompt when turning on or restarting the computer... And in this case (closing the laptop lid), the computer goes to sleep. The appearance of the password after exiting these states is determined by completely different parameters. And here's how to turn it off:
- Go to the search bar of the Taskbar (magnifying glass near the Start menu)
- Type the phrase " Login options»
- Run the found tool " Login options» .
- Under "Login Required" select " Never».
Or, here's an even faster way:
- Press Win + i
- We select the item "Accounts".
- In the left column "Login Options".
- In the item "Required entry" we put "Never".
Thus, we are still with you disabled and prompted for a password in Windows 10 after waking up from sleep .
Wouldn't life be so much easier without passwords? Not so safe, but much easier. Don't memorize a lot of numbers for everything we do on the Internet, or wait for reset confirmation emails and enter complex phrases into programs. However, life is not that easy and passwords are used wherever possible.
Windows 10 users also cannot get away from this problem, since a password is required to work with the operating system. You will not be able to completely remove it. Even for the local account to work properly, you still need a lock. However, there are easy ways to simplify login and reduce the productivity impact of a password.
By default, every time you boot Windows 10, you will be prompted to enter your password, cancel the screen saver, or change user. All of this is customizable. While it won't be possible to completely remove the password, we can still stop the login prompt after every Windows startup, or cancel the screensaver.

On a note! There is a way to completely avoid passwords by using a guest account. To get started, let's find out how to cope with the need to enter a password at login and on the lock screen.
Removing password at login
If you want a device running Windows 10 to boot without interruption and the system does not bother you with a password, then rest assured that everything will work out. If you are the only user or allow other people to access your computer, do the following:

Now, every time you boot, Windows will stop asking you for a password and will directly open the desktop. Keep in mind that if you enter the wrong password at startup, this will not work. If a second request is found, follow these steps again. To do this, check the box, add a password, restart your computer, uncheck the box and confirm the action. Everything should work now.
Removing the password from the lock screen
Many are probably more worried about having to enter a password after leaving Windows 10 unattended for a while. As a result, the lock screen appears. It protects unauthorized access to the work process and personal files of the user during the absence. In a business or school environment, this feature is necessary, but at home it is annoying. Here's how to turn it off:
- Go to the "Accounts" section. It can be easily found in the "Parameters" (gear in the start menu).


- Click on the third tab from the bottom located on the left.

- Go down and find the "Login Required" option. Select the option as in the following screenshot.

- Scroll to the bottom of the screen and click on the "Lock Screen Options" text link.

- On the right side of the window, look at the bottom of the text link "Screen Saver Options".

- Make sure the box next to "Start at login screen" is unchecked.

You should now be able to boot Windows 10 and cancel the screensaver without asking for a password.
Now that passwords have been removed (mostly), find out more about the environment and who might be using your computer. As mentioned, it's okay to be the only user. Otherwise, take reasonable precautions.
Using a local account to remove the password in Windows 10
The manufacturer doesn't want you to know about this, but there are two types of accounts in the system. The first is the Microsoft account you need to sign in to, and the second is the local account. The latter has the same privileges, but does not report your activities.
To completely remove the need for a password in Windows 10, try setting up a local user account. To do this, do the following:

Using a local account in Windows 10
There are several considerations to be aware of when using a local account. First, select this profile type only after activating Windows. Second, this decision will affect OneDrive, Office 365, Windows Store, and other apps that depend on your ID. The system will also delete any preference settings on the computer.
Important! One final privacy note, if you are currently logged into Windows 10 using local data and have access to the system storage, then it will convert it to a Microsoft account. This automatically turns on tracking and all those annoying things that make the Windows 10 experience worse.
Video - How to remove a password for Windows 10
After installing a new operating system, users often began to face a situation where Windows 10 asks for a password. However, if it is not specified in the settings, the system will immediately boot into the usual mode. To set a password on OS Windows 10, disable it, change the secret code or reset it, you should read some recommendations.
How to put a password on a Windows 10 computer?
To put a password on a computer running Windows 10, you need to do the following:
- Click "Start", "Options" and select "Accounts".
- In the left menu, select "Login Options" and in the password section, click "Add".

- A new window for creating passwords will open. Here you need to enter your password and a hint that will help you remember the code in case you forget it.

- In the next window, you need to click the "Finish" button. The password was created for a Microsoft account.

How to change or disable Windows 10 login password on a computer or laptop?
How to find out the administrator password in the Windows 10 operating system?
Earlier, we wrote about how to get administrator rights in Windows 10 in various ways. However, there are times when you need to find out the password for this account. In order to hack it, do the following:
- We reboot the PC in safe mode and select "Diagnostics", "Additional parameters".

- Next, select "Command Line".

- In the console that opens, enter "copy from: \ windows \ System32 \ sethc.exe from: \ temp". This is the command to copy the sethc.exe file.

- Now we enter "copy c: \ windows \ System32 \ cmd.exe c: \ windows \ System32 \ sethc.exe", where instead of "sethc.exe" we enter "cmd.exe".
- After completing the operation, enter the exit command "exit" and restart the computer. During the reboot, press the key combination "Shift + X" to bring up the command line.
- Enter "msc" in the console. The "Local Users and Groups" window appears. We look at the name of the administrator. Next, enter "net user" Admin name "password". We set a new password.
- We reboot the PC and enter the administrator account.
For more information on how to get a password from an administrator account or disable it altogether, see the video:
What is defaultuser0 and why does the computer wake up under this account?
On the Microsoft forum, the problem has been raised more than once when, after a clean installation of Windows 10 or updating to a new version, users could not log in, as the defaultuser0 account window and a password prompt appeared. Also, users faced such a problem, whose PC came out of a long sleep under this unknown record.
The developers attributed this problem to problems in the Windows 10 assembly itself and recommended that the system be reinstalled. However, the login under the defaultuser0 account in 80% of cases appeared on unlicensed assemblies. Therefore, the problem may lie in this factor as well.
However, if you have an installation disk and you can boot from it, then you should enter "RMDIR / S / Q% SYSTEMDRIVE% \ USERS \ defaultuser0" in the command line and delete the false account. It is important to note that you should not confuse defaultuser0 with DefaultAccount.
Create a password reset flash drive
To reset your password in Windows 10, you can create a USB flash drive. However, you will only be able to remove the request to enter the secret code if you are using a local record, and not an account from Microsoft. We recommend taking an empty USB flash drive for this purpose. The process of creating the media itself will look like this:
- Open the "Control Panel" and select "User Accounts". In the left menu, select "Create a password reset disk".

- The Forgotten Password Wizard will open. We press "Next".

- Choosing a medium.

- Enter the password for the current record. If you do not know him, click "Next".

- The process of creating a USB flash drive will start.


- Run the "psw" file on the created USB flash drive.
The password will be reset in a few seconds.
For more information on how to disable the password when logging into Windows 10, see the video:
 Skype free download Russian version Install Skype application
 How to recover a photo on Android after deleting it?
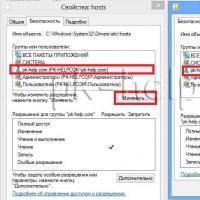 Original hosts for Windows operating systems What should be in a Windows 7 host
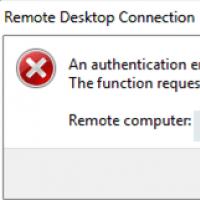 An authentication error has occurred
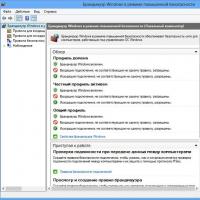 Open the following ports at the client's workstation
 How to hide all VKontakte friends in the new version?
 Hide friends on VKontakte