Hp pavilion dv7 parsing. Computer resource U SM
In today's article, disassembling an HP Dv7 laptop: remove the battery, remove the hard drive and RAM, remove the Wi Fi module, pull out the keyboard, and get to the cooling system. For disassembly, we need: a screwdriver, tweezers, a plastic card, a dust brush, thermal paste (if there are plans to replace it).
You can see the disassembly instructions in pictures or at the end of the article:
1. Latch to the side (along the red arrow) - pull out the battery along the green arrow

2. The lid hides the RAM and the hard disk from us, it is held by six bolts, we unscrew all the bolts indicated by the red arrows and remove it.

3. To remove the drive- you need to unscrew the bolt near the number one and pull it. To pull out the hard drive- we unscrew the two bolts indicated by the red arrows, and pull it out in the direction of the green arrow. To pull out ram- push the latches to the sides along the green arrow

HP Dv7 disassembly remove hard drive
4. To pull out the wifi module- we unscrew the two bolts near the number 1, and remove the wires. For further disassembly - unscrew all the bolts pointed to by the red arrows

5. We turn the laptop over, with a plastic card we pry the upper bar above the keyboard

6. The plank is held above the keyboard by a cable, disconnect it and debug the plank to the side

7. The keyboard is held by four bolts (red arrows) and a cable, unscrew the bolts and turn the keyboard over

8. Raise the latch and pull out the cable, debug the keyboard to the side

9. We pull out the wires that go from the monitor to the Wi Fi module, green arrows point to them. We pull out one monitor cable, and disconnect the touchpad cable. Unscrew the six bolts that hold the monitor (red arrows), debug the monitor to the side

10. Unscrew the three bolts indicated by the red arrows, pull out the train - green arrow, debug the bar to the side

11. Unscrew all the bolts indicated by the red arrows, pull out the train - green arrow

12. We put the laptop on its side, insert a plastic card between the top and bottom covers, lead it in a circle, gradually detaching the latch, debug the top cover to the side

13. Disconnect the board from the bottom cover by unscrewing four bolts (red arrows) and pulling out five loops (green arrows). The loop under the number 1 is under the board, you need to turn the board over and pull it out

14.
Disconnect the cable, I wrote about it in paragraph 13 
15. We unscrew the four bolts indicated by the red arrows and remove the cooling system

16. We clean everything from dust, change the old thermal paste

That's it, this is the end of the disassembly of the HP Dv7 laptop, we clean everything from dust and reassemble in the reverse order, if something is not clear to you - watch the video from TaMa_Ghazi Diagnose Reparatur und Service Laptops
We disassemble the HP Pavilion dv7 series laptop.
More precisely, in our case, the disassembly is carried out using the example of the HP Pavilion dv7t-1000 model, but the instructions should be suitable for all models of the Pavilion dv7 laptop line.
This guide will show you how to access memory modules and hard drives when upgrading your laptop, remove most of the internal components, and clean the cooling fan.
Warning
This article is not a guide to action! You are solely responsible for collecting and disassembling your device.
Many manufacturers do not assume warranty obligations if the device has been disassembled by the user. If you do not want to void the warranty for your device, check the warranty terms in the documentation or with the device manufacturer.
Used tools
Turn off the laptop and remove the battery before disassembling.
Remove the 4 screws from the hard drive compartment cover and memory module cover. Remove the cover.

Remove the 4 hard drive screws (2 for each drive).
Slide hard drive 1 to the left until it detaches from the motherboard. Remove hard drive 1.
Slide hard drive 2 to the right until it detaches from the motherboard. Remove the hard drive 2.

Remove both RAM modules.
Disconnect the two antenna cables from the wireless network card. This laptop has three antenna cables, but only two are used.
One of the antenna cables is connected to the main pin on the wireless network card and the other to the auxiliary pin. All three antenna cables are labeled.
Remove the two screws securing the wireless network card. Remove the wireless network card.

Remove the screw that secures the CD / DVD drive.
Slide the CD / DVD drive to the left and disconnect it from the motherboard.
Remove the CD / DVD drive.

Remove all the circled screws from the bottom of the laptop in the picture.
The green circle indicates the keyboard fastening screw.

Be sure to remove the two screws in the CD / DVD drive bay.

Begin to separate the panel above the keyboard (above the speakers) from the laptop chassis.
You can use a guitar pick to pry off the panel. Insert your guitar pick into the slot between the panel above the keyboard and the body, and slide it slowly along the edge of the body.

Remove the panel above the keyboard. Be careful! The panel is still daisy-chained to the motherboard.

To disconnect a ribbon cable, you must first unplug the connector.
The following picture shows the ribbon cable connector in the detached position.

Now you can remove the panel above the keyboard.

Remove the 4 screws securing the keyboard.

Lift the keyboard up to reach the ribbon cable underneath.

Carefully unplug the keyboard cable connector.
Slide the brown tab about 2mm in the direction indicated by the arrows in the picture. You do not need to detach the brown retainer from the connector base.
Do not break the connector, otherwise the keyboard will not work after assembly!

In general ... here it broke) Thousands of keyboards are disassembled, and nothing, and then once - and the connector is broken!
So, as you can see, in the picture, the latch is missing a pin on the left.
Don't panic! The one-pin latch is still useful for securing the connector.

Route the Wi-Fi antenna cables through the hole in the case.
Remove the three screws securing the speaker module.
Disconnect the speaker cable from the motherboard (indicated by the green arrow in the picture).

Remove the speaker module.

Disconnect the video cable from the connector on the motherboard.
Remove the 6 monitor hinge screws (3 per hinge).

Begin to separate the monitor module from the laptop chassis.
In the next tutorial, we'll look at.
By the way, to disassemble the display panel, it is not necessary to remove it from the case.

Disconnect and remove the Nonvolatile Memory (CMOS) / System Clock battery.
Remove all the circled screws from the bottom of the laptop in the picture. The green circle marks a screw in the CD / DVD drive bay that is not visible.

Remove all screws securing the upper case.
Disconnect the touchpad ribbon cable from the motherboard.

Begin to separate the top of the case from the bottom.
You can use your guitar pick in the same way as in step 6.

Remove the upper case.

This is how the upper part of the case looks from the back side:

Disconnect the USB and audio board cables from the motherboard (indicated by the green arrows in the picture).
Disconnect the cooling fan cable from the motherboard (indicated by the yellow arrow).
Remove the 4 screws securing the motherboard.

Lift up the motherboard on the right side as shown in the picture below and disconnect the power supply connector cable.

Remove the motherboard from the laptop base.

On the back of the motherboard is the processor. To get to the processor, you must first remove the heatsink.

The easiest way to find a replacement motherboard on sale is by the part number. It is usually identified on a sticker in the memory module compartment. The HP serial number is XXXXXX-001.
This is what a laptop case looks like without a motherboard:

The USB board, audio card, cooling fan, and power supply connector are attached to the base of the laptop case. The power supply connector is attached to the wires.
To remove the cooling fan, you need to remove the two screws that secure it.
As you can see, the fan is dusty and needs to be cleaned.

Disassembly is complete. Reassemble in reverse order.

Well, let's start with the fact that I have owned this device for 4 years now, I clean it about once a year, you can say that you need to more often, but as my practice shows, once a year is quite enough, unless of course you like to lie with a laptop on a duvet or there where there is a lot of dust.
On the spot, cleaning and assembling slowly takes about 1.5 hours if you are not in a hurry. True, I must say that you should not rush in such matters, as they say, rush is needed when catching fleas
To begin with, we note that those who have never disassembled such devices and are afraid to screw it up, it is better to entrust this matter to someone who knows how to do it, and those who are decisive read the material further.
I note right away if you often forget something, then it is better during the disassembly process to mark where you unscrewed / removed this or that part (for example, when you unscrew the bolts, write on a piece of paper from where you unscrewed them and put the bolts on it), and you yourself will not get confused and spend less time ...
Well, everything seems to be, but I forgot to mention that for this process you need a thin Phillips and flat screwdriver, thermal paste (for your taste, I used AlSil 3 for lack of anything else) and a knife, and why I’ll show and tell you further. Well, I think it's worth recalling that we do everything carefully and slowly.
Well, let's start a mini guide
Photo of the device itself:


As you can see, it is far from clean.
And now we start the process, first we remove the battery by pulling the highlighted lever to the left, take out the battery and pull the same lever to the right and remove the compartment cover.

Next, we remove the RAM by releasing the clamps (shown in blue), we take out the strips themselves. Then we remove the WiFi module by unscrewing the bolts (marked in red) and removing 2 terminals, we remove the module itself. We remove the drive by unscrewing the bolt, and you can pry it out and pull it out (shown in yellow). We remove the hard drive (if you have 2, then remove both) by unscrewing the bolts and disconnecting the cable (shown in green). And we also dismantle the bios battery (marked in purple), personally I do not take it off, but I advise you. if you don’t notice, you can cut off the already thin wires.

Our laptop will look like this. Now we will unscrew the top cover, looking ahead I will say that 3 types of bolts are used here: a long cross bolt (blue), a short cross bolt (red), and generally a short (green), and also remove 2 connectors (purple) ... We unscrew all these bolts.

Next, remove the keyboard, unscrew this bolt (red) in the same place and, turning it over, pry the keyboard along the upper edge, with something thin, you can use the same knife and take it out, just do not rush to pull it because it is connected with a short loop. They just lifted and disconnected the loop itself. By the way, do not try to just pull the train. you will tear it, first open the lock (this is such a small slab, along the way I will show it to you):

Next, turn off the loops shown in blue (by the way, the lock itself is shown with a blue arrow, the white bar which must be lifted on one side and it is easy to pull out the loop itself), and also unscrew the 2 bolts shown in red.

Now we carefully pry the lid with a flat and thin object, I used a knife for this, but it should be borne in mind that you cannot drive it there by more than half a centimeter, otherwise you risk cutting something with it.
Not so long ago, they brought me an HP ENVY dv7 laptop for repair - a practically new device, still in protective films, the screen of which was a pitiful sight. I did not ask the owner what caused such an injury to the computer, but I promised to repair the laptop.
First of all, I connected an external monitor to the laptop and made sure that the filling, unlike the matrix, is alive and functioning well. The operating system has booted successfully.
It remained to disassemble the laptop, find out the model of the matrix installed in it and replace it with a new one. I started by searching the Internet for a laptop disassembly procedure. To my surprise, I found only one link, where the disassembly of this model was shown in the photos. I was not too lazy to print photos from the site in order to subsequently sign on them the dimensions of the screws unscrewed from the laptop case.

Knowing from the experience of previous repairs, these screws of various lengths will not be enough. I prepared several jars for storage in advance, marking them for the size of the screws.

And so, let's start disassembling. Having turned the laptop upside down, first of all, we disconnect the battery. Then, unscrewing the only screw, remove the cover, under which the memory, hard drive, and WI-FI module are hidden. We carefully unscrew and disconnect all this economy. From the Wi-Fi module, first disconnect the antenna connectors. Immediately, under the lid, a BIOS battery is glued - we disconnect its connector and carefully, prying it off with a screwdriver, separate it from the case.

We proceed to unscrewing the screws circled in the photo above in circles. We put them in pre-prepared jars, sorting by size. We take out the DVD-ROM, under which two more screws are found. We unscrew them. We turn the laptop over to the working position. Now you have to remove the keyboard. We pry the latches on the top of the keyboard with a thin (preferably plastic) object, lifting the keyboard where the latches were released and placing something under it (for example, matches) so that the keyboard does not come back into place. After all the latches are released, carefully lift it up and disconnect the ribbon. Disconnect all cables located under the keyboard. Including the matrix cable.

Then we carefully pick up the black frame of the case, which is held along the entire perimeter with numerous latches. We act by analogy with the keyboard. The bezel has been successfully dismantled - in front of us is the filling of the laptop.

Now our task is to detach the cover of the device with the matrix installed in it. Gently release the wires of the Wi-Fi antennas from the body, a long cable from the speakers located in the lid, and peel off the matrix cable from the radiator. We unscrew the four screws of the metal fastening of the cover.


That's it, the lid is in our hands. We put the laptop aside, it will not be needed until the assembly begins.

All that remains is to remove the broken matrix from the laptop lid. The framing around it also keeps on numerous latches along the entire perimeter. The only subtlety about the disassembly is the two screws that hide under the speaker grill. It must be carefully peeled off on both sides until the screws appear. We unscrew them.


After that, the screen bezel can be easily removed. We take out the matrix by unscrewing several screws, it is impossible to confuse anything there. Raise the matrix a little and disconnect the ribbon cable from the web camera board at the top of the cover.


Screw dimensions (diameter x length):
Under the battery - 2.5 x 2.5
For DVD-ROM - 2.5 x 2.5
HDD mount - 2.5 x 4.5
Mount the Wi-Fi module - 2.5 x 2.5
Circled in the photo around the perimeter of the case - 2.5 x 8.5
Perhaps this description will help someone save a few hard-earned rubles by avoiding going to the service(and, consequently, payment for the work performed in it) if it is necessary to replace the matrix in a laptop, which now is not difficult to acquire on your own.
If you are starting to disassemble a laptop for the first time, we recommend that you pay attention to the article "". This article provides guidelines to help you avoid common mistakes during the disassembly process.
HP Pavilion dv7 7000 Series is based on the same chassis as the HP Pavilion dv7-7000er, dv7-7001er, dv7-7002er, dv7-7002sr, dv7-7003er, dv7-7004er, dv7-7005er, dv7-7006er, dv7- 7010us, dv7-7150er, dv7-7160er, dv7-7161er, dv7-7163er, dv7-7170er, dv7-7171er - these models have the same disassembly process.
How to clean a laptop from the dust HP Pavilion dv7 7000 Series
If the laptop overheats during operation and shuts down abruptly, this is most likely due to overheating of the cooling system. This is due to the accumulation of dust on the radiator. If you do not clean the cooling system in time, this will lead to damage to the motherboard in the laptop. You can fix this problem yourself by repeating all the steps shown in the video below. The information provided in our video instructions makes it possible to clean the laptop from dust yourself at home. The necessary repair tools can be purchased at the end of the page.
Reassembling HP Pavilion dv7 7000 Series
Once disassembled and repaired, this video will help you reassemble your laptop.
 Skype free download Russian version Install Skype application
 How to recover a photo on Android after deleting it?
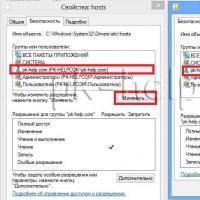 Original hosts for Windows operating systems What should be in a Windows 7 host
 An authentication error has occurred
 Open the following ports at the client's workstation
 How to hide all VKontakte friends in the new version?
 Hide friends on VKontakte