Opencart step by step instructions. Opencart - instructions and documentation. General OpenCart settings
This series of articles aims to help beginner OpenCart developers raise their level of knowledge and help them become more advanced developers.
This is especially true for those developers who are familiar with PHP, Object Oriented Programming, and the Model View View (MVC) design pattern.
In the first part, we will consider the following questions:
- What is OpenCart?
- Installing OpenCart on a local machine;
- Parsing the basic structure of directories and files.
What is opencart?
In the modern age of information and technology, no one can diminish the importance of the Internet in our lives. In this light, it will not surprise anyone that the direction of e-commerce is developing at a towering pace.
OpenCart is a free, open source, advanced e-commerce system designed to make it easy to create your own online store.
Why opencart?
There are many factors that speak in favor of OpenCart, but here are the main and most important ones:
- OpenCart is very simple for both developers and end users;
- There are many articles on the Internet that will help you figure out almost any situation;
- A complete set of documentation is written for the system, so that developers can easily find information about every detail of the platform;
- Customizing the code for yourself is very simple, so even a beginner level developer can figure out the system code;
Of course, this is just a superficial overview. Now let's look at some of the strengths that OpenCart has over other alternatives.
I note that although the platform has a large number of strengths, in this article we will consider only a part of them.
Strengths:
- Several stores in one system;
- Powerful tools for automatic image resizing;
- Built-in error log;
- Backup and recovery;
- Multilingual support;
- Support for a large number of modules.
Installing OpenCart on a local machine
First of all, download and install the latest version of XAMPP on your computer by visiting the Apache Friends website and installing the appropriate version for your system.
I note that in my examples I use Windows 7. Download the file and follow the instructions.
After the installation is complete, start the XAMPP server, and start the Apache and MySQL services. Make sure both services are highlighted in green, if not, restart the services.

Sometimes Apache won't start because of Skype. If you have this problem - try to close Skype and start the service again.
At this step, we should have everything ready to start working. Let's download the latest version of OpenCart from the official website as shown in the screenshot.

Now open XAMPP and click on the Explorer button on the right. It will open a Explorer window in the directory where XAMPP is installed. There will be an htdocs directory - just open it.
Unzip the OpenCart archive, copy the uploads directory inside htdocs , and rename it (I named the unpacked directory OpencartStore). The second step is to create an empty file called config.php in the admin directory.
Now open your favorite browser and enter http://localhost/OpencartStore .
You will see the installation page, which will show you the text of the License Agreement. Just click the button Continue(Further).
On the page Pre-Installation(Installation requirements) you must ensure that all requirements in the section PHP Settings and Extensions(PHP settings and extensions).
Mac and Linux users must set the correct permissions on the listed files and directories (chmod 0775)

Go to phpMyAdmin and create a database. For example, I have created a database called storedb . Now fill in the form fields Configuration(Configuration) values similar to those listed below:
On the next page, make sure that your PHP settings fully comply with the minimum OpenCart requirements.
Mac and Linux users need to set appropriate write permissions to these directories (chmod 775).

- Database driver (database driver): MySQL;
- Database Host (database host): localhost;
- User (user): root;
- Password (password): ** database user password **;
- Database Name: storedb (the one you created with phpMyAdmin);
- Database Prefix (table prefix): (leave as is, oc_).
On the last page, fill in the details of the store administrator:
- Username (username): admin;
- Password (password): admin;
- Email: (mailing address of the resource administrator).

Clicking the Continue button will take some time as OpenCart copies the table structure and PHP files. Don't worry about the time, just wait a couple of seconds and your store will be ready!
Don't forget to delete the "OpencartStore/install" directory after successful installation.
Understanding the basic file structure
OpenCart has a very simple file structure. Users will not experience any difficulties after becoming familiar with the main purpose of directories.
- admin - stores directories with Models, files of Views and Controllers of the administrative panel, as well as language files and directories;
- catalog - contains Model, View, Controller and Language files. Also in the View directory you can find some files and directories with templates;
- image - contains banner files, logos, product images and image cache
- system - contains OpenCart framework core files. The most important files in this directory are libraries (library) and helpers (helper).
We will look at this in the next articles in the series.
Let's start the OpenCart installation instructions from the very beginning and in order. First, what you need to install the OpenCart engine. You need a domain and hosting - in fact, where you will install it. Hosting is a disk space on a remote server where your site will actually be located. Domain - the name of your site on the Internet. Both are paid. You also need the engine itself - site files for installation, it's free.
Let's start with a domain name and hosting for your future store. I use the services of the Ukrainian hosting company for my sites, so I will show everything using this hoster as an example. You can choose anyone by googling for queries website hosting, the main thing is that there should be support for php and databases, all self-respecting hosters now have it. It is easier to register a domain and hosting in one place. So, let's begin!
If you assume that you will have one site (your store) and that's it, the simplest tariff plan for one site will be enough for you, and disk space is also enough for you to start. We order the simplest tariff:
Go through the process of placing an order, and pay for hosting immediately for a year - it will be cheaper. It is more convenient to register a domain after paying for hosting, when you get into your site's admin control panel, and not during the registration of a hosting account (may be offered). After paying for hosting, you are already in the site control panel. All further manipulations are done already here. First, register a domain name. To do this, go to the Domains tab and click Register a domain:

Choose a domain zone that suits the price and come up with a domain name. You also pay for a domain for a year - domains are not paid for less. And only when you have registered and domain hosting, you can start installing OpenCart. I don’t see much point in these manipulations to install the engine on Denver on your computer to see, and then transfer it to the hosting, if you need one store for yourself, just fool around longer. Do everything right away on the hosting. When the domain is paid, go to the Hosting tab and select My Sites:


And in the pop-up window that appears, enter the domain name you registered and click the Add button. For example:

When the site is ready it should look like this:

Part of the work is done - the place for your future site is prepared. If you click on the link (domain), the following picture should appear (only with your domain and 15 minutes after registration):

So everything is done right! But that is not all. Now you need to make a database for your future store. The OpenCart engine works in such a way that all information (product descriptions, category names, etc.) is stored in the database. That is, you add a product in the admin panel of the store - all this information enters the database, then it is already displayed from the database in the user part of the store. We also create a database right away. On the Hosting tab, click on the Databases link:


A pop-up window will appear. Come up with any arbitrary name and click Create, without changing anything else! The database has been created. The password for it is generated automatically. If everything is done correctly, it should be like this (only with your login):

One more step passed. But that's not all. We will need to somehow upload the files of our site to the hosting. The most convenient way to do this is through an FTP client, a little about it below, but for now you need to immediately make a login and password to access your future site via FTP. On the Hosting tab, as you already understood, all manipulations with the site are done on this tab, click FTP Users:


We come up with a username and password. The result should be like this (only with your login):
 That's it! The preparatory work is done - you can proceed with the installation of OpenCart itself, which will take less time than preparation. Download the jockey itself from the official site. Unpack the archive on your computer. After unpacking, the upload folder and files with instructions will appear. It is the contents of the upload folder (this is the site) that needs to be uploaded to a remote server:

For uploading files, it is convenient to use the free FileZilla FTP client. Be sure to download and install this program for yourself - when setting up the site, you will often need it. Launch FileZilla and connect to our server. To do this, enter the FTP access data we recently created:

Leave the port blank and click Quick Connect. The left side of the program is our computer, the right side is a remote server. Expand the upload folder with the site files on the left so that all the files of our site are visible. On the right you will have one folder with the name of your site (domain). We open it. There will be a www folder, open it. There will be an index.html file in the www folder - this file must be deleted (right-click and select delete), and instead upload the files of our site. To upload, hold down the left mouse button and select all the site files, then right-click and select Upload to server:

When the site files are uploaded to our hosting, we turn to our site - you can type the domain in the address bar of the browser and press Enter, or go to the site from the hosting control panel. If everything is done correctly, there will be a picture like this:

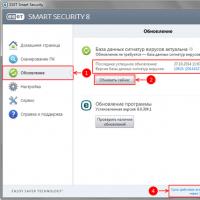
We agree with the license and click Continue. Next, we look for the states to be green everywhere.

I have written that two configuration files are missing (everything else is green). In fact, these files exist, but they are called differently. Through the FTP client we find these files (we see the paths to the files - we go to the corresponding folders already on the server). And rename the config-dist.php files to config.php - right-click on the file and select rename:

One such file right in the root directory (no need to go anywhere and search). The second one is in the admin folder - you need to open the admin folder and it contains a file with the exact name - rename it too. It should be like this (and the same in the admin folder):

After renaming, we update the page with the installation. When all states are green, click Continue:

The next step is to fill in the fields with data about the database. And create a username and password:

 When all fields are filled, click Continue:

Ready! We can go to the admin panel, or to the showcase of our store. Also, after installation, you need to delete the install folder from the root directory:
 All our shop is ready! If this instruction for installing Opencart seemed too complicated, there is, not only for installation, but also for setting up this engine.
Ask questions in the comments.
Hello. In the last article of this series of articles, conditionally called "Russian OpenCart", I . Successful installation of OpenCart is checked by control entrances to the storefront and to its administrative part.
To enter the administrative part of OpenCart, you must remember the login and password of the store administrator, which were set during the store installation stage. If you forgot the password and administrator login, read my article and restore everything that you forgot.
Main page of the administration panel of Open Cart
The correct title for the main page of the Open Cart administration panel is "Status Panel". The administrative panel menu opens like a slider on the left side of the page (the button to open the menu is at the top of the page, above the menu).
OpenCart developers have created the most convenient store home page. The basis of administration of Opencart is its menu. It is located on the left side of the page. All menu items are active and open when pressed.
The page contains all the necessary modules for visual evaluation of store activity. Here and the number of orders (1), the number of sales (2), the number of registered customers (3), the number of buyers in on-line mode (4). In addition, visitor entry map (5), graphical analysis of the number of customers versus the number of buyers (6). Completes the statistics: the Buyer Activity module (7) and the latest orders (8).
General OpenCart settings
After getting acquainted with the main page of the OpenCart administration panel, let's move on to the general settings.
Store name OpenCart
Go to the System→Settings tab from the administrative panel menu.

We see the name of the store by default and its URL address. All store settings are made through the "pencil" button (2), which we press. This is the main page of the Opencart admin panel that we are using in this article. Here, all the main settings of the store are located.

As you can see, the OpenCart general settings page includes its own menu of 8 items:
- Main;
- Score;
- Localization;
- Options;
- Images;
- Mail;
- Server.
We go to each tab of this menu and set the general settings of our Opencart online store.
General OpenCart Settings - General

The main OpenCart settings include setting the store name (Title), description (Description), key phrases (Keywords). These columns are directly related to the SEO optimization of the store and are required.
1. Title must be no longer than 70 characters with spaces and include the store's main product group (master key). For example, "Kindergarten: Internet trade in goods for children" or "Shinprom: sale of car tires." The Title in a concentrated form should contain the whole essence of your Internet trading. 2. Description(description) should reveal the title of the store. The length of the description is not more than 160 characters with spaces. More is possible, but search engines will cut it off in the preview of search results. 3. keywords(key phrases) tag is no longer relevant for SEO. But it is better to fill it with 3-5 main key phrases.Note: Before creating an online store, you should have prepared the main and extended semantic cores for promotion and optimization of the store site. It is the semantic core that serves as a source for the title, description and keywords in the settings of the online store.
4. The settings "Store template" and "Store layout" (5) are left as "default". We cannot change the store template, because it is the only one, and we will not change the layout so as not to get confused in the settings. Looking ahead, I note that the layout is the appearance of the storefront with the modules placed on it. You can create the layout yourself.CMS Opencart is the perfect solution for creating a small trading resource. It does not require special costs and has such advantages as:
Multilingual support.
Unlimited number of pages, categories, products, brands.
Modular system (the ability to create several stores on Opencart on one platform).
Search engine optimization.
Expansion of functionality by installing add-ons.
Ability to install different themes.
There is also a Russified extended version of OpenCart - ocStore. We will install it, since “out of the box” it is the most effective for Russia. Unlike OpenCart, it already has:
Russian language pack
Database localization
SEO optimization (added title and h1 for products, categories, manufacturers, etc.)
Extended functionality.
So, let's take a step-by-step walkthrough of how to create an Opencart store.
Step 1. Installing Opencart on hosting
Description. Here we enter a description of the category for the visitor. The display depends on the template.
Title HTML tag. Enter the title of the page here. For example, "Russian cuisine".
HTML H1 tag. Here you can duplicate the title of the page. In our example, it will be displayed as in the figure.

- Description meta tag and Keywords meta tag. These are description and keyword meta tags for search engines.
Data tab:
parent category. If the category we are creating is a parent category, then we do not select anything. If it is a subcategory, then select the parent category for it here. In our example, “Russian” is the parent category, so we leave it unchanged.
SEO URL. Here we set the URL tag of our category to be displayed in the link. The name of the category is usually indicated in Latin. If the category consists of two words separated by a space, then the space is changed to a hyphen or underscore. In our example, it will be “russkaya”.
Category image. Here we add an image that will be displayed at the top. The display depends on the theme you are using. In our example, it will be displayed under the text of the H1 HTML tag (circled in the figure above).
Main menu. When checked, the category will be displayed in the top menu. Works only for main categories.
Save the category by clicking on the floppy disk icon at the top. Subcategories are added in the same way, only in the parent category it is necessary to indicate which category the subcategory belongs to.
Step 4. Adding and configuring a product on Opencart
Go to Catalog => Product. In the window that opens, we see the products already created during the installation process. You can keep them as an example or remove them. Deleting is the same as deleting categories.
How to add a product to Opencart - a simple example
Add a new product by clicking on the plus sign at the top. A page will open with several tabs, which we will consider.
General tab:
Name. The name of the product, for example “Fresh cabbage soup”.
Description. The description of the product that the visitor will see.
- Title HTML tag, H1 HTML tag, Description meta tag, Keywords meta tag. These fields have the same functions as the categories, but only for the product.
Product tags. Product tags in Opencart are a kind of product tags that are displayed at the bottom. They can quickly find similar products, they have a positive effect on search engine optimization.
Data tab:
- Product image. Main product image. It will be displayed on the category page and first in the product card.
Model. Here we specify the product code that will be displayed in the product card. You can use an internal article number or a unique name.
Price. We indicate the price of our goods.
Quantity. Specify the quantity of goods in stock.
- Minimal amount. Specify the minimum order quantity. That is, if you have a wholesale trade, you can specify the minimum quantity you need to add to the cart in order to place an order for the product.
- Subtract from stock. If “Yes” is indicated, then the quantity in stock will decrease with each order. In our example, the product is prepared every time after the order and does not have a certain quantity in stock. Therefore, we indicate “No”.
- Out of stock. Select the text that will be shown to the visitor if the product is out of stock.
SEO URL. Just like in the categories, we prescribe a unique label for the link. For example, shchi-iz-svezhej-kapusty.
- Dimensions (L x W x H). Be sure to specify if you will later use modules to calculate delivery. In our example, sizing is not required.
Unit of length. What do we measure - cm or mm.
The weight. Specify the weight of the item.
Unit of weight. What do we measure - kg or g.
Status. We indicate the status “Enabled” so that our product is displayed on the storefront.
Links tab:
Manufacturer. In our example, the production is our own, so we leave the field empty. In other cases, we indicate the manufacturer here. Pre-manufacturers must be added through which Catalog => Manufacturers.
- Related products. Related products in Opencart are products that are displayed in the main card, under the description. Here we can indicate the products that you advise to purchase for this product. For example, accessories. In our example, bread, pita bread and more. These items must already be added to the store to be able to select them.
Tab "Discounts":
Here you can set prices depending on the quantity (2). Specify the quantity at which the discounted price starts to operate (1). Also, this discount can be limited in time by specifying the start date and end date (3 and 4). To add a new discount from the next quantity, click on the plus (5).

Promotions tab:
Here you can set a new price for a certain period, for example, for a sale. Specify the new price (1), start date and end date (2 and 3). If you need to specify more, then click on the plus (4).

Images tab:
On this tab, we can add additional images for our product.
Bonus points tab:
On this tab, you can use the bonus points accumulation system to purchase goods.
1. In the "Points" field, indicate the number of points for which the buyer can purchase the product. If the item cannot be purchased with points, enter 0.
2. In the "Bonus points" field, specify the number of points that the buyer will receive by purchasing the product.

After making all the settings, save by clicking on the floppy disk icon at the top. This completes the creation of a simple product.
Let's move on to a more complex product, which in our example has different portions.
How to add a product to Opencart - a more complicated example
Before adding a product, we need to add options by going to Catalog => Options. In the window that opens, we see the options already created during the installation of Opencart. We delete them in the same way as before in the categories.
Add a new option by clicking the plus at the top.
2. Then select the type of option - in our example “Switch”, so that you can select only one option.
3. Specify the sort order - optional.
4. Next, enter the option values by pressing the plus: the value itself (5), the image to it (6) and the sort order (7). The sort order in our example is important so as not to break the logic, since there will be two values (250g and 300g) and they must follow in ascending order.

Now let's move on to adding a product with options. Previously, we have already added a product and we will not dwell on this in detail, with the exception of the “Options” tab, which we have not yet considered.
1. Select the newly created “Serving” option on the tab. A window for entering values will appear.
2. In the “Required” field, set the value to “No” so that the buyer can add the product without selecting an option. But for this, the product card with the default option must be fully registered - the price and weight of the portion must be indicated (100 rubles and 200 g, respectively).
3. Add a new option value.
4. Choose a value.
6. We prescribe a surcharge on the price.
7. Add weight to the original portion.
8. We save the goods.

Here is the card we ended up with:

Thus, in Opencart we can set up filters that describe a variety of product properties. The buyer will be able to choose goods by color, size, modification, configuration and other parameters.
Step 5. Set up accepting payments on Opencart
1. To set up payments, go to Addons => Payments. There are several payment modules on the page.
2. By default, they are not installed and in order to install them, you need to click on the plus.
3. After that, you can proceed to editing by clicking on the pencil icon.

In our example, we will consider only one payment method - “Payment on delivery”, since all other methods are similar and differ only in the number of fields to fill out. If you have payment aggregators connected, you will need the information provided by the aggregators.
Let's go to editing the module:
- Minimum amount. Specify the minimum amount for payment by this method. If the order amount is less than this value, the method will not be available.
- Order status after payment. We indicate the status of the order after receipt of payment. In our example, the status will be “Delivered”.
Status. To enable the method, select “Enabled”.
Step 6Set Up Opencart Shipping
In our example, two delivery options will be used - a fixed shipping cost (150 rubles) and free delivery for orders over 1000 rubles.
1. To set up delivery methods, go to Add-ons => Delivery. On the page that opens, we will see several delivery methods, among which there are those we need.
2. Install them by clicking on the plus.
3. We proceed to editing by clicking on the pencil.

Let's start by editing the "Fixed Shipping Cost" method:
Price. Specify the cost of delivery. In our example, 150.
tax class. We change it to “Not selected”, since we do not use taxes when working with individuals.
Save by clicking on the floppy disk at the top.
- Cost threshold. Specify the minimum amount in order for free shipping to become available. In our example - 1000.
Status. Specify "Enabled".
We save.
Outcome
We briefly talked about creating an online store on Opencart using the example of a food delivery store. Of course, in the article we have considered only the basic settings of the modules. With a closer look at the engine, you can build an online megastore with your own marketing gimmicks.
Do not limit your imagination! Install the engine, choose the right theme and experiment!
That's all. Good luck in creating an online store!
Greetings, site readers! 🙂
Today we continue our acquaintance with various CMS. And in this article we will consider creating an online store on OpenCart.
First, let's refresh our knowledge about CMS (engine). In short, this is a ready-made site, which each owner adjusts for himself, adding new functionality and interface elements, as well as modifying the existing one or completely removing elements that are redundant, in his opinion.
So, back to the topic of the article 🙂 We are considering the development of an online store on OpenCart, because this engine is among the free products. And this is not my subjective opinion. In all Runet ratings, he does not fall below the 5th position.
Let me remind you that its advantages include ease of installation and store management, as well as powerful functionality for free products. All the necessary features are available in it: a product card with its description, a user account, a shopping cart, customer and sales analytics, and much more. Read more about its advantages and disadvantages in the mentioned article. And best of all, it's a free product! 🙂
Of course, this is not a completely true statement, because, as you know, free cheese is only in a mousetrap 🙂
But compared to commercial engines, the costs of running stores based on it will be limited to paying for hosting, registering a domain name, and paying for modules and programmers if you need to do something individual.
Summing up the above, I will say that OpenCart is an ideal solution for someone who wants to launch a small trading resource without much cost. In addition, I have especially tender feelings for this engine, because. this is my first CMS with which I started my job as a web programmer. That is why she opens this series of articles dedicated to creating sites on various engines 🙂
So, let's talk about creating an online store on OpenCart in more detail.
The installation of templates, modules, as well as their development, as promised earlier, I will make in separate articles.
Selecting the version of CMS OpenCart to create an online store
At the moment, the most current version is 2.1.0.1. Its release took place on October 6, 2015.
Due to the fact that it was quite recently, only the previous version of OpenCart 2.0.3.1 was Russified, which we will use.
It must be said that this state of affairs, unfortunately, does not speak of the highest quality official support for the product, because. since the release of version 2.0.3.1. half a year has passed (release May 29, 2015). On the Internet, I have already come across Russian versions of the latest version of OpenCart, but they are assemblies, i.e. partially redesigned versions of the engine.
- Their advantages compared to a "clean" engine is their addition of very necessary and interesting functions (built-in Russian payment systems, delivery methods, filters with various criteria, etc.).
- The disadvantages include the fact that they are not always free, and in case of questions about the store, you can not count on official support, but be patient to find an answer on the build forum 🙂
We will not consider them in this article, but we will definitely devote material to them, because. they certainly deserve attention.
Preparatory stage for creating an online store on OpenCart
So, let's proceed directly to creating a site on OpenCart. I recommend that you first install it on your computer. And then, if you like it, transfer the already finished store to the hosting.
Before you install something, you need to download it.
OpenCart has a website of the official Russian-language representation. From there we will take the engine installer - http://opencart.ws/download.html. To do this, download the latest available file - with version 2.0.3.1 (redirects to the official English site).
Here you have the engine itself. What to do next?
The next step in creating an online store on CMS OpenCart will be its installation on a local web server. For those who do not know what it is, I recommend that you read the article "".
As it says in it, I personally use the OpenServer web server, which I recommend to you. After you install it, go to the ..\OpenServer\domains folder (this is the folder where the site files hosted on the web server are stored).
Copy the archive with the engine into it and unpack it. As a result, you should get something like this:

Now you need to make the site itself on OpenCart.
To do this, create a folder with the name of your resource. In my case, this is "opencart2".
Next, we transfer the engine files to the site. To do this, go to the ..\OpenServer\domains\opencart-2.0.3.1\opencart-2.0.3.1\upload folder and copy all the files that are in it. If someone has forgotten, the key combination Ctrl + A is used for this.

We return to the directory with the list of sites and paste the copied files into the folder of your store.
If you did everything right, then you should end up with the following:

Fine! By the way, do not forget to delete the folder with the engine files and the archive so as not to leave unnecessary files and not get confused in the future.
The next step in the development of the site on OpenCart will be the launch of the installer. But first we need to do some more preliminary steps. You would have learned about the need for them during the installation process thanks to the comments of the installation wizard, but we will not wait for this and will do everything right away.
First, rename the config-dist.php file to config.php. Do the same with the file in the "opencart2\admin" folder. These are the files where, when installing the engine, its settings will be written, without which it will not work. In addition, if you leave the files unnamed, the engine simply will not install and will display a message about the impossibility of writing settings.
Secondly, we will need to create a . If you do not know what it is and why it is needed, I suggest that you get acquainted with the article of the same name. To do this, we will use the phpMyAdmin program, which is built into OpenServer. You can run it like this:

When you click on this menu item, a tab with authorization in this program will open in your Internet browser:

We log in to phpMyAdmin by entering the username and password of the user that you specified when installing OpenServer. If you entered the data successfully, then the program window will appear in front of you:

The next step in creating an online store on OpenCart is to add a website database. To do this, click on the "Databases" tab in the main window.

Here you need to enter the name of the database and click on "Create". In my case, the database is named the same as my website - "opencart2".
Since we have downloaded the official English version, in order to fully create an store on OpenCart, we will also need to download the crack. It is available on the page http://opencart.ws/download.html under the link "Russian language for Opencart 2.0.0.0 - 2.0.3.1". Next, we proceed according to the same scheme - copy the archive with the localization to the folder ..\OpenServer\domains and unpack it:

Open the RussianOC2\upload folder and see that there are files sorted into directories that repeat the structure of the engine:

Therefore, to install the crack, we need to copy them and paste them into the folder with the site, overwriting existing files if they match.
But, looking ahead, I hasten to disappoint you that the Russian interface language can be added only after installation. The installation will have to be done in English. But there is nothing wrong with that, especially since I will show you all the necessary information to be entered and where to enter it 🙂
At this preparatory stage of creating an online store on OpenCart comes to an end. Next, we move on to installing the engine itself.
How to create an online store on OpenCart: installing the engine
After you have copied the engine files to the site folder, you must restart the web server itself so that it accepts the changes. Restart occurs in the main menu of the server, which opens when you click on the program icon in the launch line (in the form of a flag).
Click on the "Restart" pen item in the form of a yellow flag.
After the above steps, open any Internet browser (Chrome, Mozilla, Safari, etc.) and enter the name of your store in the address bar.
If you did not get to the engine installation screen and the browser searched for the given word in the default search engine, then a window should appear with the question “Did you mean switching to “Your site name”?”.
Click "Yes" and if you have performed all the previous steps correctly, then the following screen will appear in front of you:
 Here is the first step of installing the engine, without which the creation of an online store on OpenCart of any type is indispensable - a traditional license agreement. Which traditionally no one reads 🙂
Therefore, we click "Continue" ("Continue") and move on.
 At the second step, the system is checked: how prepared it is for creating an online store on OpenCart. As a rule, there are no requirements for server software. If there is a red flag somewhere, you need to read on the Internet how to update the version of the inappropriate program on OpenServer, or simply use the latest version of the product when installing the web server itself. Then there will definitely be no problems 🙂
P.S. the version of my OpenServer is far from fresh, but it satisfies the requirements.
In the third block (which for some reason has serial number 4 on the installation screen 🙂), a warning would have appeared if we had not renamed the config-dist.php files.
In the last block (it didn’t fit in the picture for me), the rights to access various directories of the engine are displayed. Here, too, as a rule, everything is in order. If there are any restrictions, then they depend on the rights of the root folder of the site or ..\OpenServer\domains. In this case, you need to open public access for them.
If everything is in order, we continue to create an online store on OpenCart by clicking on "Continue".
 On the third screen of the CMS installation, we enter data to access the database (which we successfully pre-created). And the site administrator account settings: his username and password (under which you will be logged into the administrative part), as well as an e-mail that can be specified on the site for complaints and customer support 🙂
In the database connection settings, enter the blank fields: the login and password of the account in phpMyAdmin and the name of the database itself. All other fields can be left unchanged.
 If everything went well, in front of you you will see the final screen of the engine installation with buttons to go to the administrative part and the storefront. There are also links to some modules from the store on the official portal of the engine. If black rectangles suddenly appear, as in my illustration, do not worry - this is just a small flaw in programmers. The links themselves are working.
In my experience, I'd say it's better to do it right away. Otherwise, this warning will appear every time you want to enter the administrative part.
To remove the installer, go to the site folder and delete the "install" directory. We won't need it anymore.
This completes the main part of the first stage of creating an online store on OpenCart. As a result, you can go to the storefront and make sure that the site is working 🙂
 Everything is great! 🙂
For one small drawback that everything is in English 🙂
To correct this situation, we enter the administrative part and turn on Russification, the files of which we copied to the site at the very beginning.
 Enter the login and password of the administrator account that you specified when installing the engine. Click "Login" ("Login").
 If all the data is entered correctly, you will see a nice OpenCart admin panel, which I personally really like (on versions 1.5.x.x, with which I started working, the admin panel was more modest).
So, the next goal when creating an online store on OpenCart is to add the Russian interface language. To do this, select the side menu item in the form of a gear:
 In the menu that opens, select the item "Localization" ("Localization"). And in the submenu that opens, select "Languages" ("Languages").
On the screen that opens, click on the button in the upper right corner in the form of a plus sign on a blue background to add a new language. After clicking, a screen with its parameters will open:
 Enter the following information here:
- Language Name: English
- Code ("Language code"): en
- Locale ("Localization"): ru_RU.UTF-8, ru_RU, russian
- Image ("Image"): en.png
- Directory ("Folder"): english
The rest of the fields are left unchanged. We press the button in the upper right corner in the form of a floppy disk on a blue background to save the language. After the performed actions, the list of languages will take the form:
 The next step on the way to creating an online store on OpenCart is to enable the language on the site. To do this, in the side menu of the admin panel, select the gear again and click on the “Settings” item.
 On the screen that appears with a list of sites (OpenCart allows you to create several stores based on the engine and manage them from one admin panel), open the settings of our site.
This is done by clicking on a button in the form of a pencil on a blue background, located on the same line as the address of your site and the inscription "Your Store" ("Your Store").
On the settings screen that opens, select the "Local" tab:
 Here we select the country and region where the store is located (it will be taken into account when calculating the cost of delivery), the language of the storefront and the administrative part.
Currencies are also available (in the future it will be possible to edit this list without any problems) and units of measurement (used when specifying product attributes).
After entering the values, also do not forget to save the changes by pressing the button with the diskette.
 And here we have the Russified admin panel of the store! 🙂 Checking the storefront (client side):
 And here it’s somehow not very 🙂 But on the other hand, a drop-down menu appeared at the very top left with a choice of languages, which was not there by default. Choose Russian language.
But with Russification, the language changed only on the controls. The names of categories, products and their descriptions remained in their native English (I specially brought the screen of the shopping cart, where there are a large number of controls, and you were convinced of the work of our changes).
But here, too, there is nothing to worry about, because. when creating an online store on OpenCart, you will still change the default (set by default) categories, products and descriptions to your own, which you will trade.
At this point, the first stage of creating a site on OpenCart - installing the engine on the computer comes to an end. Ahead of us is the installation of graphic templates, modules and filling the store with goods.
I will also say a few words about transferring a ready-made store to a hosting.
Let me remind you that we deployed the store on a local web server.
When installing the engine immediately on a remote server, the procedure is exactly the same: copy the installer to the server, create a project folder, copy the files and start the installation process. In this case, the stage of transferring the store to the hosting, of course, will be skipped 🙂
This is an introductory article describing creating an online store on OpenCart, comes to its logical conclusion 🙂 Ahead of you is a detailed description of the next stages of the store deployment, and I will also talk in more detail about OpenCart builds, which, as already mentioned, have a number of advantages compared to a "clean" product.
Subscribe to updates to be aware of the release of new articles, share the post on social networks with your friends, involve them in the discussion.
I also look forward to your feedback and suggestions in the comments.
If something didn’t work out for someone or if you have questions about installing OpenCart, don’t hesitate to ask! I will be happy to help and answer everyone!
Good luck to all! 🙂
P.S.: if you need a website or need to make changes to an existing one, but there is no time and desire for this, I can offer my services.
 Eav 9 license key
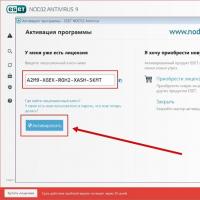 Node licenses 32 9
 Determining the effectiveness of SMM
 Typical dynamic pages
 Check Yandex TIC and Google PR
 Limiting the speed of users who exceeded the daily limit