What does Dr Web Cureit do? We check the effectiveness of the antivirus and quickly remove viruses using the free Dr.Web CureIt utility. Settings section Exceptions
Dr. Web CureIt is a free virus-cleaning utility that can be used to check your computer for viruses. The utility can be used even if another antivirus is installed on the computer, i.e. conflicts between Dr. Web CureIt and installed antivirus does not occur. A big plus of CureIt is that it can be run from a USB flash drive - you do not need to install the program on your computer.
Where to download Dr. Web Cure It Free
Important! Download the utility only from the official website of the program. Otherwise, there is a big risk that you will download a program infected with viruses.
Step 1. Go to the Doctor Web website and click on the button Further (the official site always contains the latest version of Dr. Web CureIt, so do not try to download the utility via torrent).

We read the small user agreement and click the "Next" button.
Step 2 Read the information about the program and click on the button Download Dr.Web CureIt! with the function of sending statistics(if you select the option "I refuse to send statistics", then we will be offered to buy the program, so free use of Dr.Web CureIt is possible only if statistics are sent to the utility's developers).

Click on the button “Download Dr.Web CureIt! with the function of sending statistics"
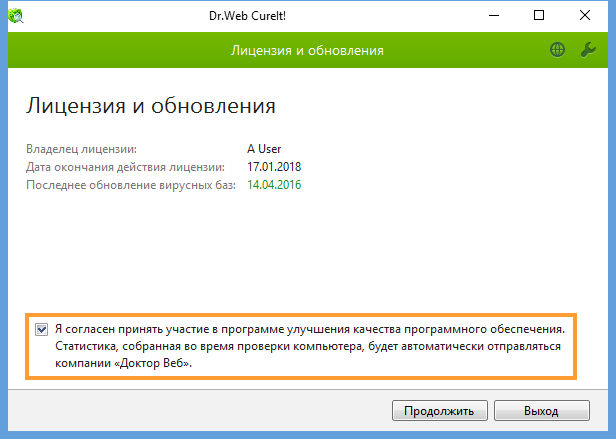
Step 3 We accept the license agreement by checking the box next to the inscription "I accept the terms of the License Agreement" and click on the button Continue.

Check the box and click on the "Continue" button
Step 4 Allow file upload.

Allow file upload
After the utility is downloaded to the computer, it can be copied to a USB flash drive and run on other PCs running Windows.
I remind you again. The utility is regularly updated - it adds information about new viruses that have appeared on the Web. When checking a computer use only the latest version of the program.
How to use Dr. Web CureIt
After launching the downloaded file (with the .exe extension), we will be prompted to run the default check, i.e. in enhanced protection mode.

It is suggested to run Dr.Web CureIt in enhanced protection mode
If you know that the computer is infected with viruses or there are signs of computer infection, then just click OK, after which the scan will begin in enhanced protection mode. In this mode, the malicious activity of viruses will be blocked by the utility.
Important! In enhanced protection mode, you will not be able to work on your computer until the end of the scan.
Full scan of the computer with the possibility of parallel work of users
Step 1. In order to be able to simultaneously scan the computer for viruses and work on it, after starting the utility, click on the Cancel button.
Step 2 We agree to send statistics and click on the button Continue.

We agree to send statistics and click on the "Continue" button


Step 5 We put a tick next to the item "My Computer" - after that all disks available on the PC will be selected. We click on the OK button.

Select all disks and click "OK"
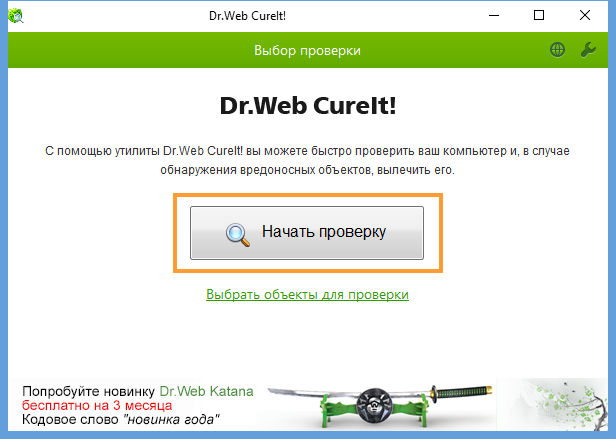
Step 6 We press the button Run check.

Click the "Start Check" button
The scan can take several hours - the scan time depends on the performance of the computer and the disk space used.
Most likely Dr. Web CureIt will find something. In a specific case, 6 threats were found, despite the fact that Kaspersky Internet Security (KIS) with fresh databases is installed on the computer. To be fair, it should be noted that the viruses were found not on the “C” drive, but on the “E” drive, on which the installers of some programs and site backups were stored.
Attention! If Dr. Web CureIt has found "left" entries in the hosts file, then before clicking the button Deactivate, read the information below.

Dr. Web CureIt found 6 threats on drive "E"
What if CureIt wants to fix the hosts file?
So, if the hosts file appears in the list of threats, then before deciding whether to neutralize the threat or not, you must proceed from the situation:
- If you cannot access sites such as Odnoklassniki and VKontakte, then it makes sense to let the utility make a change to the hosts file;
- If you use unlicensed Adobe programs, such as Photoshop, you should not rush, as most likely the hosts file will look like this:

All lines that begin with the "#" sign are comments and you can ignore them, as they are not processed. We are interested in the last four lines (circled in red):
- 127.0.0.1 lmlicenses.wip4.adobe.com
- 127.0.0.1lm.licenses.adobe.com
- 127.0.0.1 activate.adobe.com
- 127.0.0.1 practivate.adobe.com
These lines are added to the hosts file when unlicensed Adobe programs are activated. This is done so that programs cannot contact Adobe services and check the license. If these lines are removed by Dr. Web CureIt, Photoshop, After Affects, Premiere will be blocked.
Good luck to all! Protect your computer from viruses - it's contagious!
Nikolai Peredelkin
If a threat was detected in the installation package included in the archive object, then Dr Web CureIt will transfer the entire object to quarantine as a whole.
Disinfection of some objects requires a system restart.
Available options:
- Offer to restart the system;
- Reboot the system automatically. Unsaved data may be lost.
Settings section Exceptions
In this section, you can specify files and folders that should not be scanned, as well as determine whether archives and installation packages should be scanned.
Checking mail files is available only in commercial versions of the program.
List of files excluded from scanning
You can specify files or a mask by which the program will determine which files are excluded from scanning.
Creating a list of files excluded from scanning
To set a list, select one of the following actions:
- Specify a file name or create a mask. For existing files, use the button Overview. Using a mask, you can specify a part of the name that is common to many objects. Symbols used:
- * - replacement of any sequence of characters;
- ? - replacement of any single character;
- Others, used not for replacement, but meaning that this character should be in this position.
- Mask examples:
- *.jpg - any files jpg;
- log_*.txt - files with part of a word at the beginning of their names log_ with extension txt;
- file_??.doc - files doc, in the name of which after the word file_ there are 2 characters.
- To add a file name or mask, click the button Add.
- To remove a file from the list, click the button with the corresponding name after selecting it.
Settings section Report
The section is intended for making settings in the report creation mode.

The program offers the following reporting options:
- Standard, fixing the start, stop of the program and the threats that were detected;
- Debugging - the most detailed report. Recommended if you have problems with Dr Web CureIt, or upon request from technical support.
How check your computer for viruses is free. For this, the free utility Dr.Web CureIt!
In Russian, simply "Doctor Web".
You can download from the official site.
I’ll also say that it’s better to check by booting the computer in safe mode! Because, in case you don't know, a virus is a small program that silently enters your computer to perform certain actions! And programs in safe mode do not start! And the virus, in this mode, is easier to catch and remove!
How to boot your computer in safe mode?
To do this, when loading - restarting the computer, when it is just starting to turn on, you need to hold or continuously (with an interval of about 0.5 seconds) click the F8 key.
Until a black screen appears on the monitor, as shown in the picture below (if you didn’t manage to catch this moment the first time, then restart the computer and try again):

Using the arrows on your keyboard, you need to select the line "Safe Mode" and press Enter.
Of course, you can run the scan in normal mode! This is just a suggestion for the best!
Let me remind you that Dr.Web CureIt does not require installation on your computer! The utility just runs and does its job. After that, you can simply delete it, like a regular shortcut!
Regardless of the mode in which to do it, now the further steps are the same! So let's start...


So, when you click the "Defuse" button, which will appear after the scan is completed on the right side of the program, all threats will be removed from your computer! After that, you can close our "doctor".
Another important point! If, when closing Dr.Web, you will see a small white window with a warning about the modification of the host file (it is a system file), then when asked if you allow it to be fixed, be sure to answer “Yes”!
Well, I also recorded a video for you, how I do it in real life! See if you're more comfortable with the video format.
How to check your computer for Dr.Web viruses
And again, hello everyone, today we will consider another important utility for fighting viruses, this is Dr.Web CureIt!, It is free (for home use) and can be used together with an already installed antivirus, that is, there should be no conflicts.
Now let's talk a little about the scanner itself, as I already wrote, Dr.Web CureIt! this is a free scanner from the developers of the Dr.Web anti-virus itself and can remove viruses such as mail, worms, as well as those hiding in office documents, advertising viruses (Adware), potentially dangerous software, spyware (Spyware), however, everything that can harm your computer - everything will be found and deleted
Rootkit search technology can detect threats that use modern methods of hiding in the system.
But there are also disadvantages to the scanner, all of them need to be paid for for free, namely the lack of automatic updating of signature databases (when you re-check, you will need to download the scanner from the site again). Also, the free scanner does not have the ability to protect you in real time. As you can see, there are disadvantages, but they are not particularly critical. Another joke with the fact that you can check your computer only if you accept the conditions for improving the software, and statistics will be sent. But there is nothing wrong with that, believe me!
Well, that's it, we got a little acquainted with the utility, now it's time to test it - follow this link and click Download for free to download the scanner:

You will be redirected to a page where you need to read the agreement again and click Download again:

Well, now the file will start downloading. I will say right away that it weighs a lot, here I have it 180 mb, but I think this is due to the fact that it already has signature databases. Another good thing is that the file is downloaded, as I understand it, with a random name, this is so that the virus cannot determine that it is an anti-virus utility (some even block anti-virus sites to prevent removal attempts).
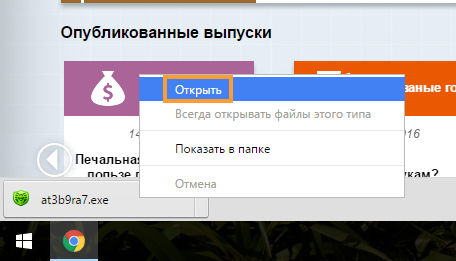
In general, how it loaded - run it (I advise you to run it as an administrator, to do this, open the folder where the scanner loaded, right-click on it and select Run as administrator):
A window will appear where you need to agree with participation in the program to improve the quality of the scanner, in general, this is probably still a minus, because without this you will not be able to use the scanner, here is such a jamb:
Before clicking Continue, I will also tell you that there are some options, you can see them if you click on the key in the upper right corner:
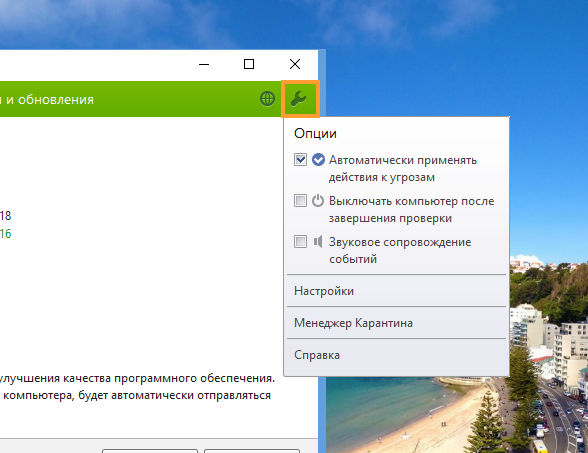
Here I see one useful option - this is to enable automatic action to found threats, you can leave it unchecked, but if you check it, all viruses found will be eliminated.
By the way, Dr.Web CureIt! resembles another scanner - only it downloads anti-virus databases separately before each scan.
Well, now you can click on the Continue button, and then - Start scanning (there will be another button under the button, if you click it, you can choose what exactly to check, which folders and areas, you can simply check the Objects to check and don’t worry, but the verification itself may take some time):
After that, the check has already begun:

It took me almost 10 minutes to check, despite the fact that there are not many programs installed and there are no games, so if you have a lot of software, then the check can be much longer.
If there are no viruses, then you will see such a message, but if there are, then Dr.Web CureIt! will try to delete them, and disinfect the infected files (if this is not possible, they will be quarantined), I did not find any viruses, so this message:
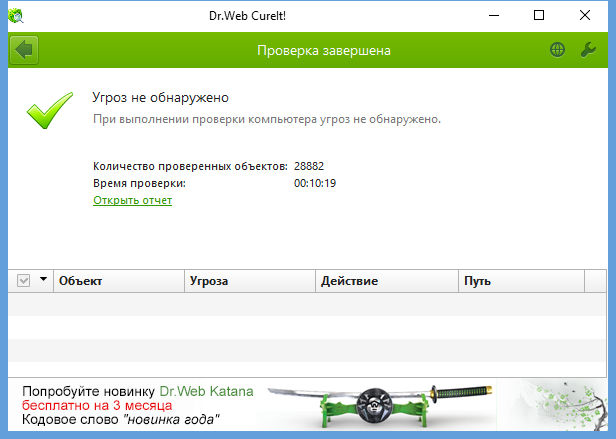
After checking Dr.Web CureIt! can be deleted, because if you want to check again later, you need to download a new one. Now it remains only to wish you good luck
14.04.2016And the virus writer said to viruses: "Be fruitful and multiply!..".
What's happened Dr.Web CureIt!
Dr.Web CureIt is a free antivirus scanner based on a standard scanner Dr. Web. Despite some limitations compared to Dr.Web anti-virus for Windows(lack of a resident monitor, a console scanner with a command line and an automatic update module, the inability to scan archives, etc.), Dr.Web CureIt! is able to effectively scan the system and perform the necessary actions on detected threats.
Dr.Web CureIt! ideal for situations where antivirus installation is not possible as a result of viruses or for any other reason, because it does not require installation, it works under MS Windows 95/98/Me/NT4.0/2000/XP/2003/Vista+ and is constantly updated and supplemented with fresh virus databases, which provides effective protection against viruses and other malicious programs.
Dr.Web CureIt! detects and removes: rootkits, mail worms, network worms, file viruses, trojans, stealth viruses, polymorphic viruses, incorporeal viruses, script viruses, spyware ( Spyware), password thieves, keyloggers, dialers, adware (Adware), potentially dangerous, hatch programs, joke programs, malicious scripts.
How to use the utility Dr.Web CureIt!?
Go to page www.freedrweb.com/cureit/, download ;
– run the utility executable file;
– press Start –> OK. The system will be scanned for active viruses;
– wait for the scan results;
– if infected objects are detected, the system will be disinfected, incurable files will be moved to quarantine (a confirmation request will be issued before any action).
Utility setup
In the main program window, on the tab Examination you can select the scan mode by setting the appropriate switch - Quick check, Full check, selectively.
On the menu Settings –> Change settings:
- tab Examination (Heuristic Analysis, List of Excluded Paths, List of excluded files);
- tab File types (All files, Selected types, Specified masks);
- on the tab Actions you can set actions to be taken when malicious objects are detected ( cure, Inform, Delete, Move, Rename);
- tab Report (Maintain a report file);
- tab Are common (Autosave settings, Use settings from the registry, Check battery life, Check Priority, Use sounds).
Virus Scan Modes
Quick check
In this mode, the following objects are scanned:
- RAM;
– boot sectors of all disks;
– startup objects;
– root directory of the boot disk;
– root directory of the installation disk Windows;
– system directory Windows;
- folder My Documents;
– temporary directory of the system;
– user's temporary directory.
Full check
This mode performs a full scan of all hard drives and (including boot sectors).
selectively
This mode allows you to select any folders and files for subsequent scanning. Along with the selected objects, the boot sectors of all disks will be scanned.
Notes
1. By default, the program performs anti-virus scanning of all files using both virus databases and a heuristic analyzer (an algorithm that makes it possible to detect viruses unknown to the program with a high probability based on the general principles of their creation). When checking, executable files packed with special packers are unpacked.
2. Treating Dr.Web CureIt! will cure the infected system once - it is not a permanent remedy for protecting against viruses. Supplied in a kit
 How to Disable Proximity Sensor on Android Phone
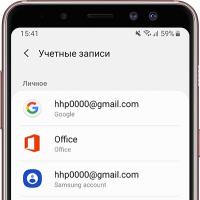 How to Set Up Account Sync on Samsung Galaxy
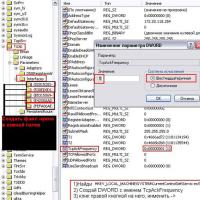 Why is ping jumping in World of Tanks
 What are lamp streams
 The game is jerky, freezes and slows down
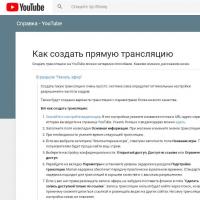 How to make a live broadcast (stream) on YouTube
 World of Tanks game freezes what to do